
Burrows & Badgers is a skirmish wargame of anthropomorphic animals. Players lead warbands of creatures, from shrews and mice to badgers and foxes, and fight for their place in the Kingdom of Northymbra. Miniatures for the game can be found on the Oathsworn Miniatures website.
When people ask me what my job is, I tell them I'm a sculptor. But to be honest, other stuff keeps getting in the way… there's only myself and my wife Jo running Oathsworn, so everything from games design to order packing needs to be covered by one of us. And we've been busy lately, which means that I haven't sculpted anything since the end of January.
So, after a six month break from sculpting, I wasn't even sure I'd still remember how to do it…
But we're a miniatures company, so we need new miniatures. Time to dig out the putty!
The plan was to do another Kickstarter to fund a set of new models; generally we do ten to fifteen at a time. I started by making a list of potential ideas:
1. Squirrel archer, male. Rogue-ish, Robin of Sherwood type.
2. Mage, female. Either fox or otter, either will work for the pose I have planned.
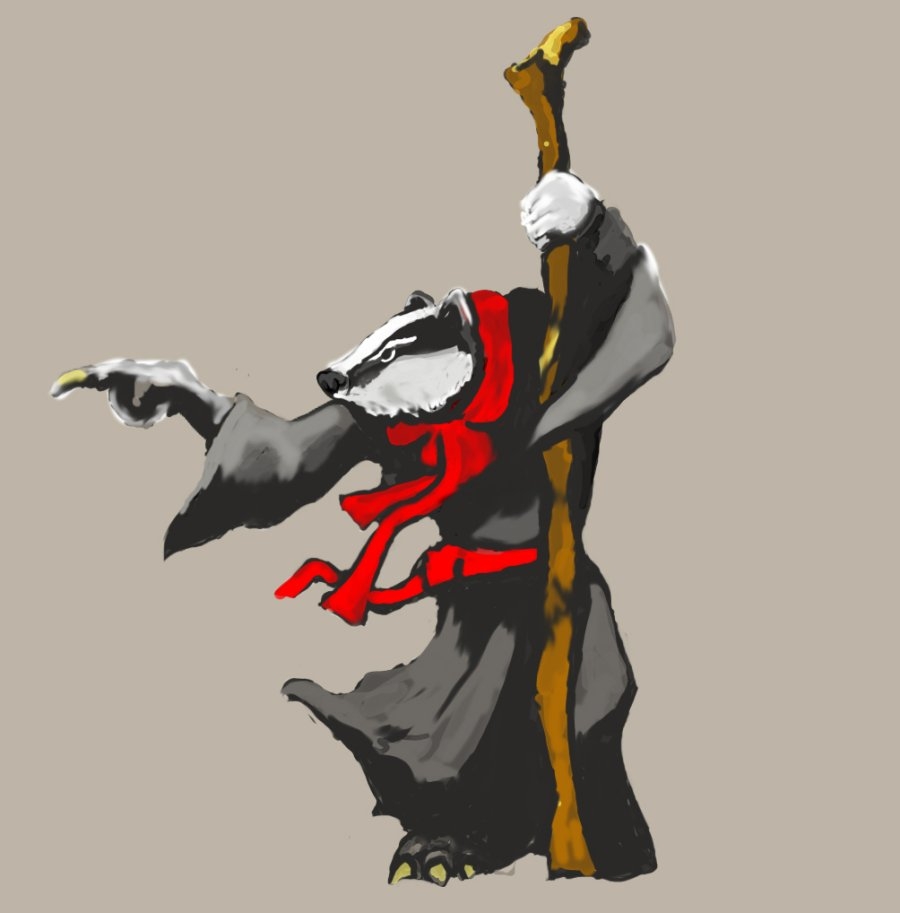
3. Badger mage, male. Old, wizened, scrawny, robes.
4. Beaver, male. It's been suggested that the beaver should be a mage, but I'm leaning towards a ruffian / brigand leader type.
5. Massive Raptor - either Osprey, Red Kite or Buzzard.
6. Massive Hound, male – Staffordshire Bull Terrier probably, or maybe a Border Collie instead. I'm picturing armour and a tabard / surcoat.
7. Weasel, male, with a blunderbuss. Similar to the picture on page 38 of the Burrows & Badgers rulebook.
8. Cat, male. Landsknecht style. Maybe a two handed sword, maybe a halberd?
9. Wildcat, female, in Highland Clan gear.
10. Shrew or Squirrel, female, in Highland Clan gear.
11. Mouse, male, helmet, armour, surcoat and crossbow.
12. Kestrel - Not certain on this one; I have a pose in my head, and if I can make it work, it'll be great. If not, I'll pretend it never happened, and sculpt a different bird instead...
13. Frog of some kind - probably a soldier/fighter type.
14. Bat assassin.
15. Shrew-zerker, similar to the picture on the last page of the rulebook.
I thought I'd start with the male Badger mage; he'd be a big (45mm+) sculpt, and I guessed the large size would make it good way to ease myself back into sculpting.
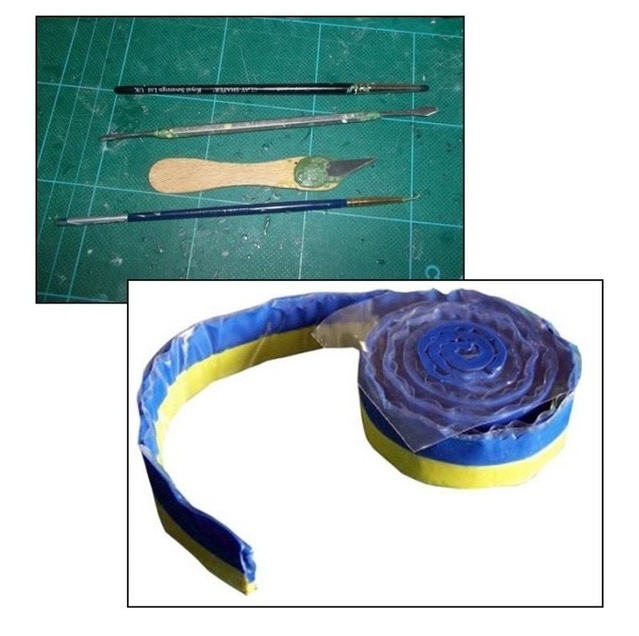
I started by getting all my tools ready. I use a fairly small number of tools; a chisel point Clay Shaper (size 0), a Zahle dental tool (commonly called a Wax carver No.5, or an SG dental), an old scalpel blade stuck to a lolly stick and a piece of bent wire stuck into an old paintbrush handle. These cover about 99% of my sculpting needs; but you can really use anything you like as a sculpting tool - if it makes the mark you are looking for, then use it! In terms of putties, I use mostly Polymeric Systems Kneadatite Yellow/Blue, more commonly known as Greenstuff, which is a two part epoxy putty, originally made for plumbers to fix pipes! I also use Brownstuff, from the same manufacturer, which is slightly less elastic and can be filed and sanded. I find Milliput to be useful as well, mostly for bulking out large pieces, or making weapons and bases.
I drew out a very rough sketch of the badger mage idea; I don't usually do this, and given how little the finished sculpt looks like the concept sketch, that's probably a good thing!
I started the sculpting process by bending some brass wire and attaching a blob of Greenstuff, to provide a basis for sculpting the head. This was left to cure.

Then, using .51mm brass wire, some clippers and some pliers, and started making an armature; I twisted two lengths of wire together, then bent the limbs to shape, and posed the armature. At this point there was no wire for the tail; I usually add that later.
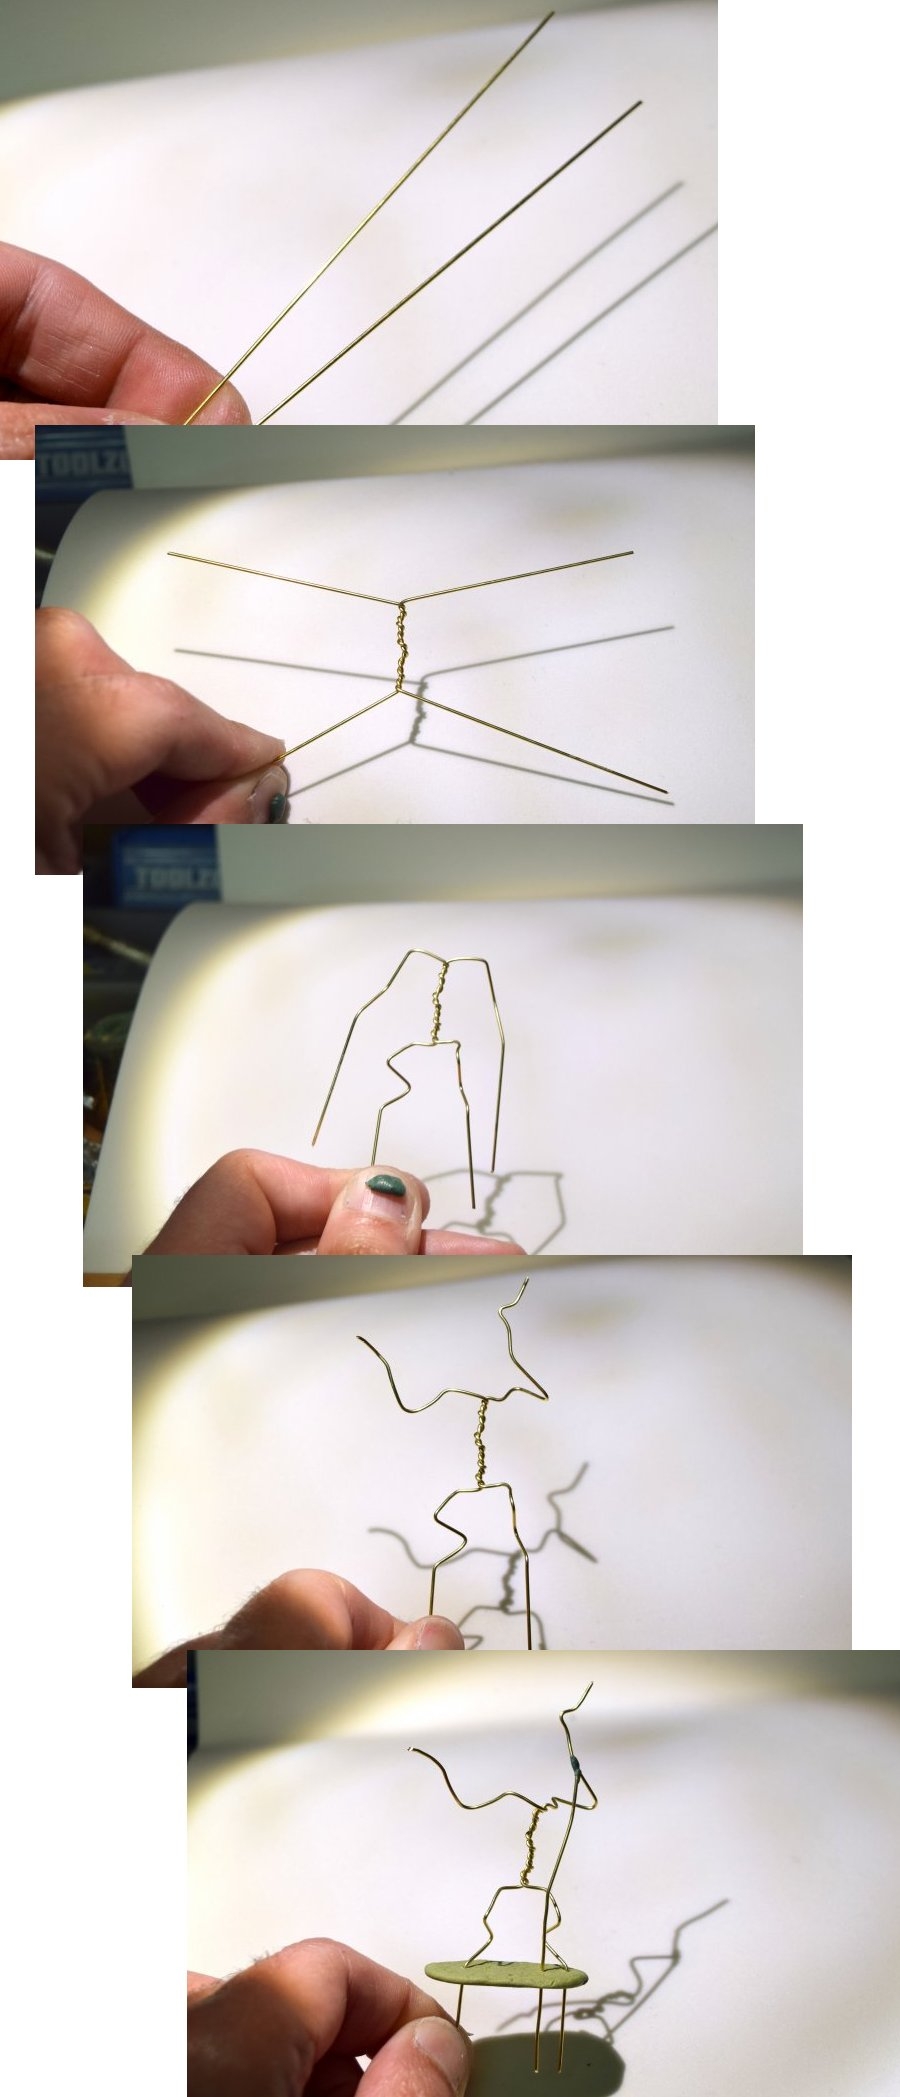
I also attached the armature to a base at this point; all the Burrows & Badgers miniatures have integral bases, which I make using equal parts of Greenstuff and Milliput. This makes the base tough without being brittle; otherwise it can bend or snap during the mouldmaking process. I press a blob of putty flat on a sheet of acetate; it's one of the few things that it doesn't stick to!
I texture the surface with a stone, and I also press the armature's leg wires into the base to make holes; the base can be very hard to drill through, and marking the holes first like this makes it much easier. Once the base has cured, it can just be peeled off the acetate.
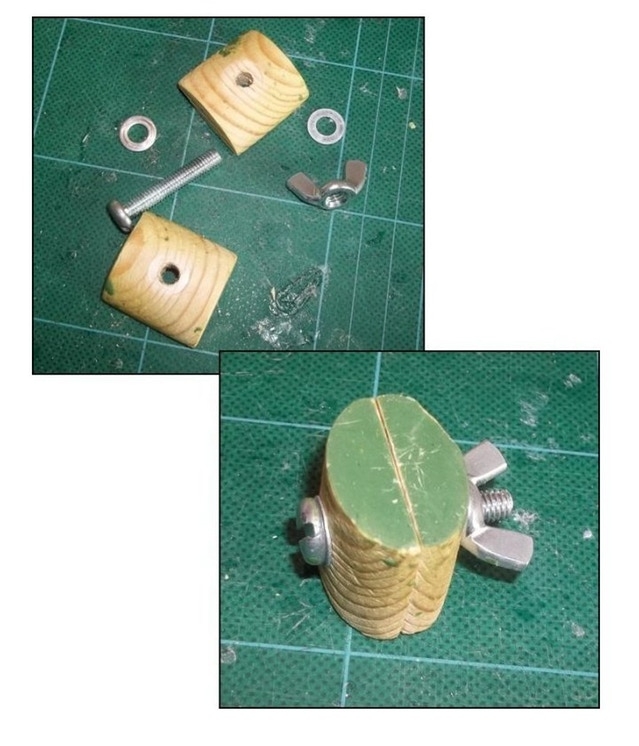
I attached the armature to one of my sculpting blocks next. The sculpting block is just a couple of pieces of wood, held together with a nut and bolt. Many sculptors use corks instead, but I've always found them to be unstable, and a part-finished sculpt falling over is definitely something you want to avoid! The sculpting block is a much more solid, stable way to hold the armature.
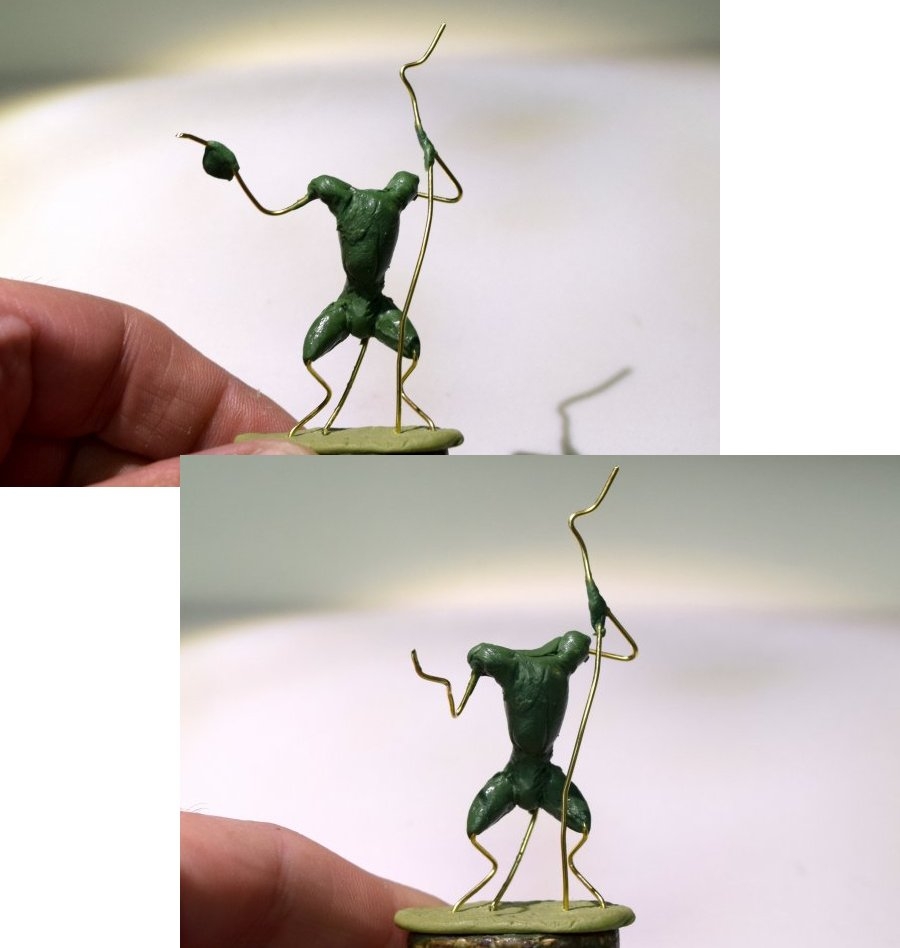
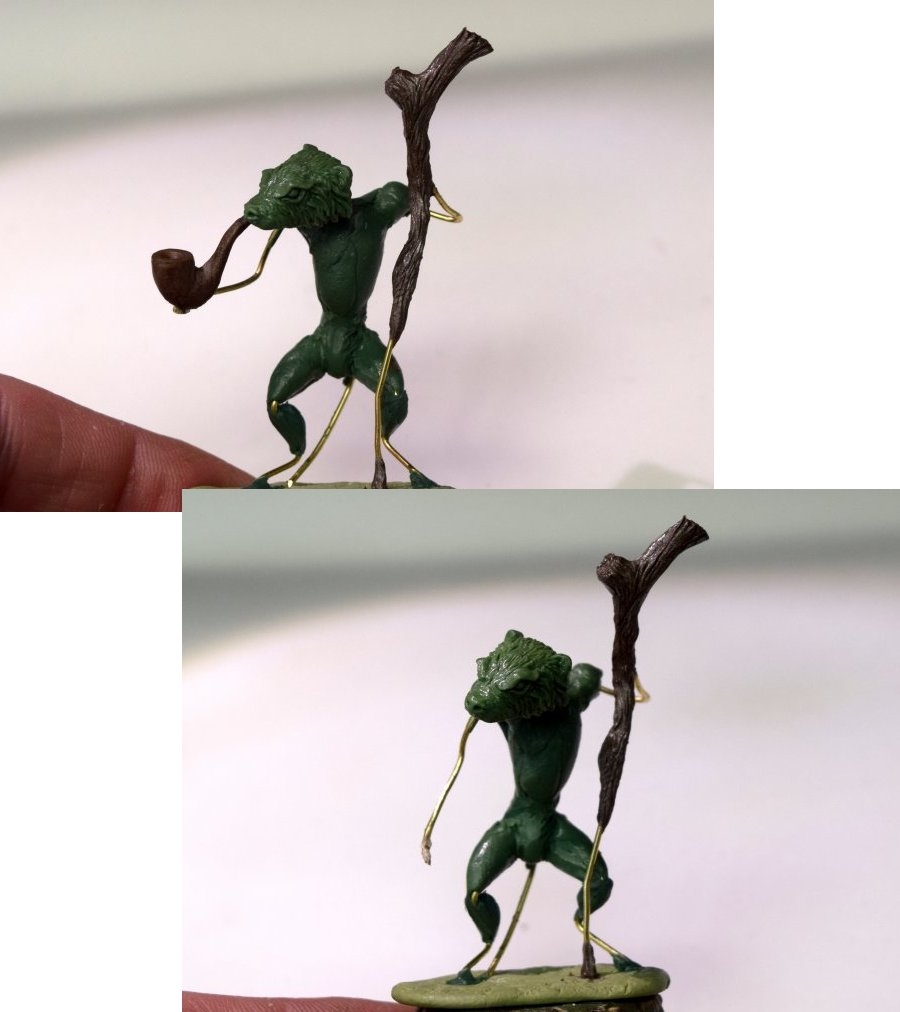
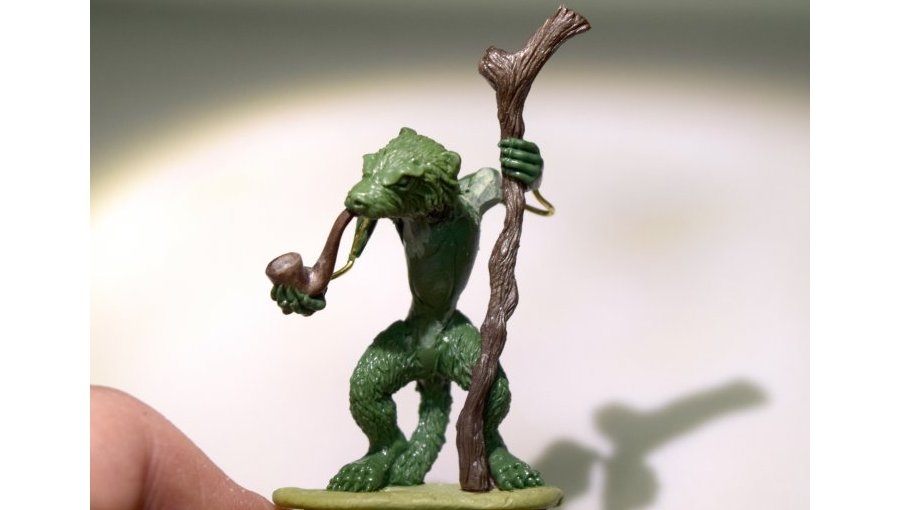
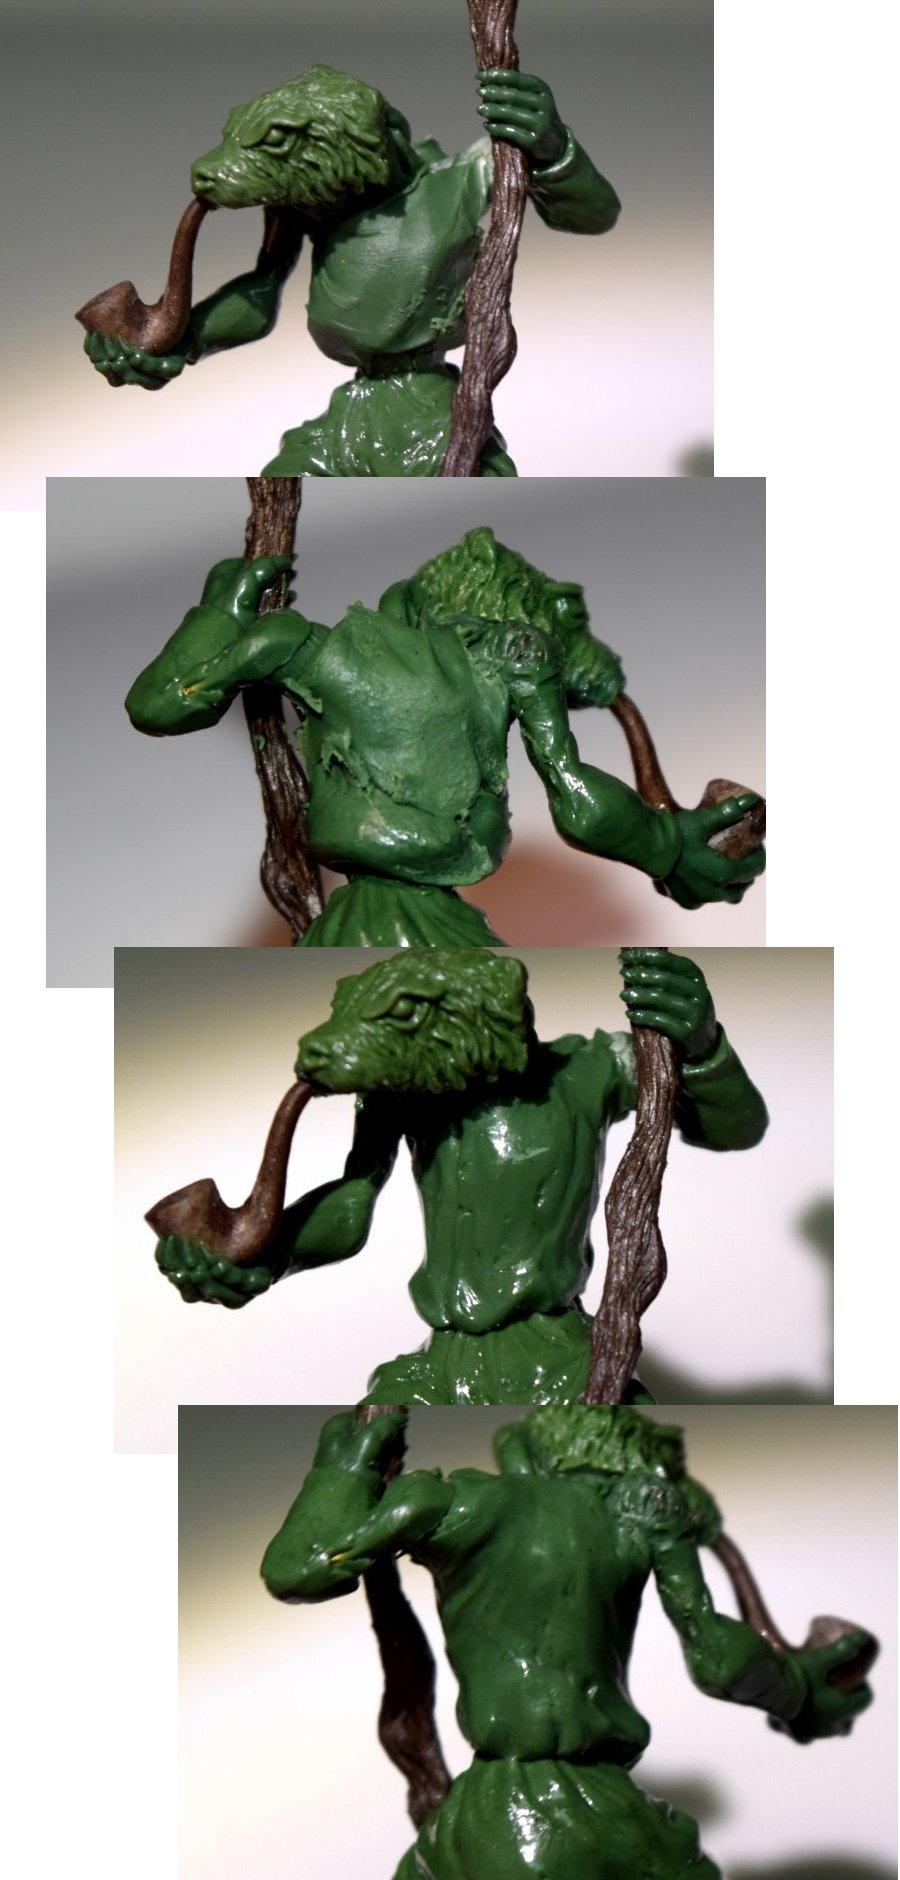
I started bulking out the body armature at this point; I kept it quite rough, because it would all be covered by fur and clothing. I added a piece of wire for the tail at this point. I also started thinking about altering the pose; I thought maybe smoking a pipe would be better than pointing, so I bent the arm to a 'pipe-holding' position.
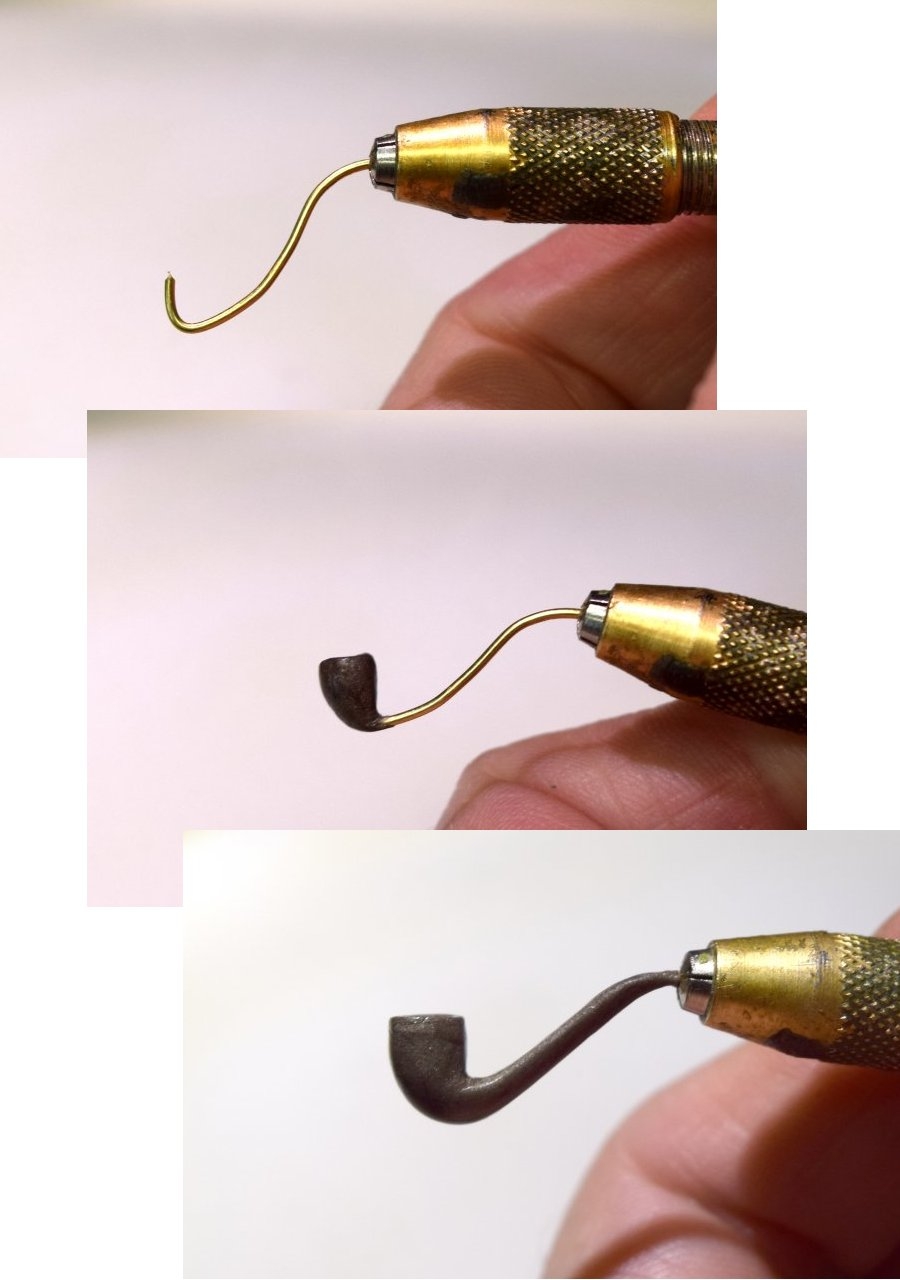
Obviously, this meant I'd need a pipe! So, I bent some more brass wire, and mixed some Brownstuff, and made the rough shape of the bowl, let that cure, then sculpted over it to complete the pipe.
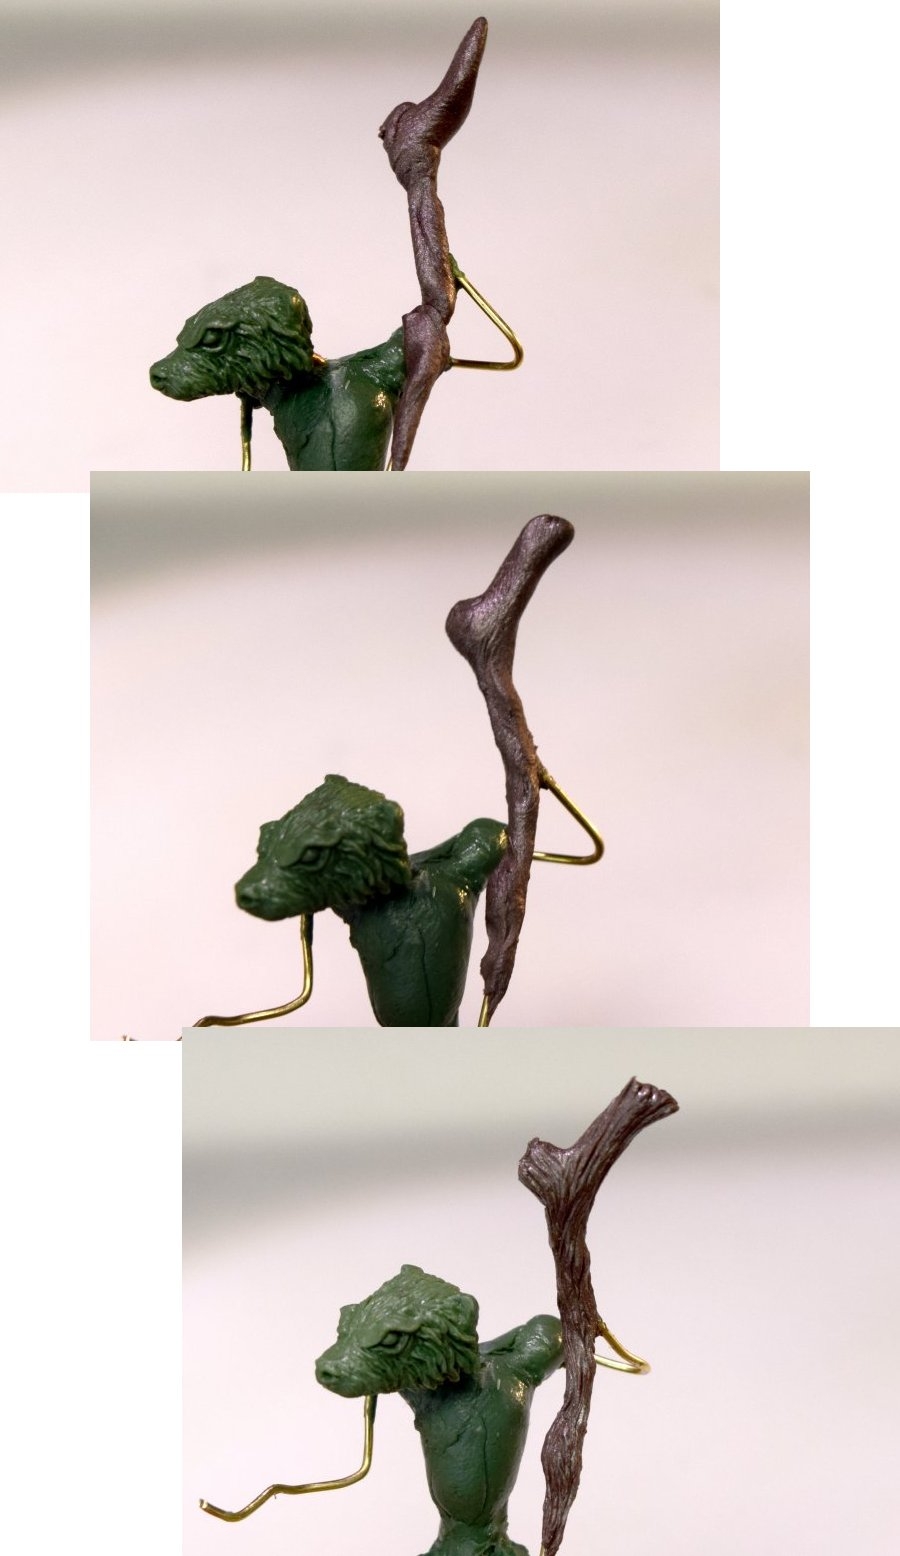
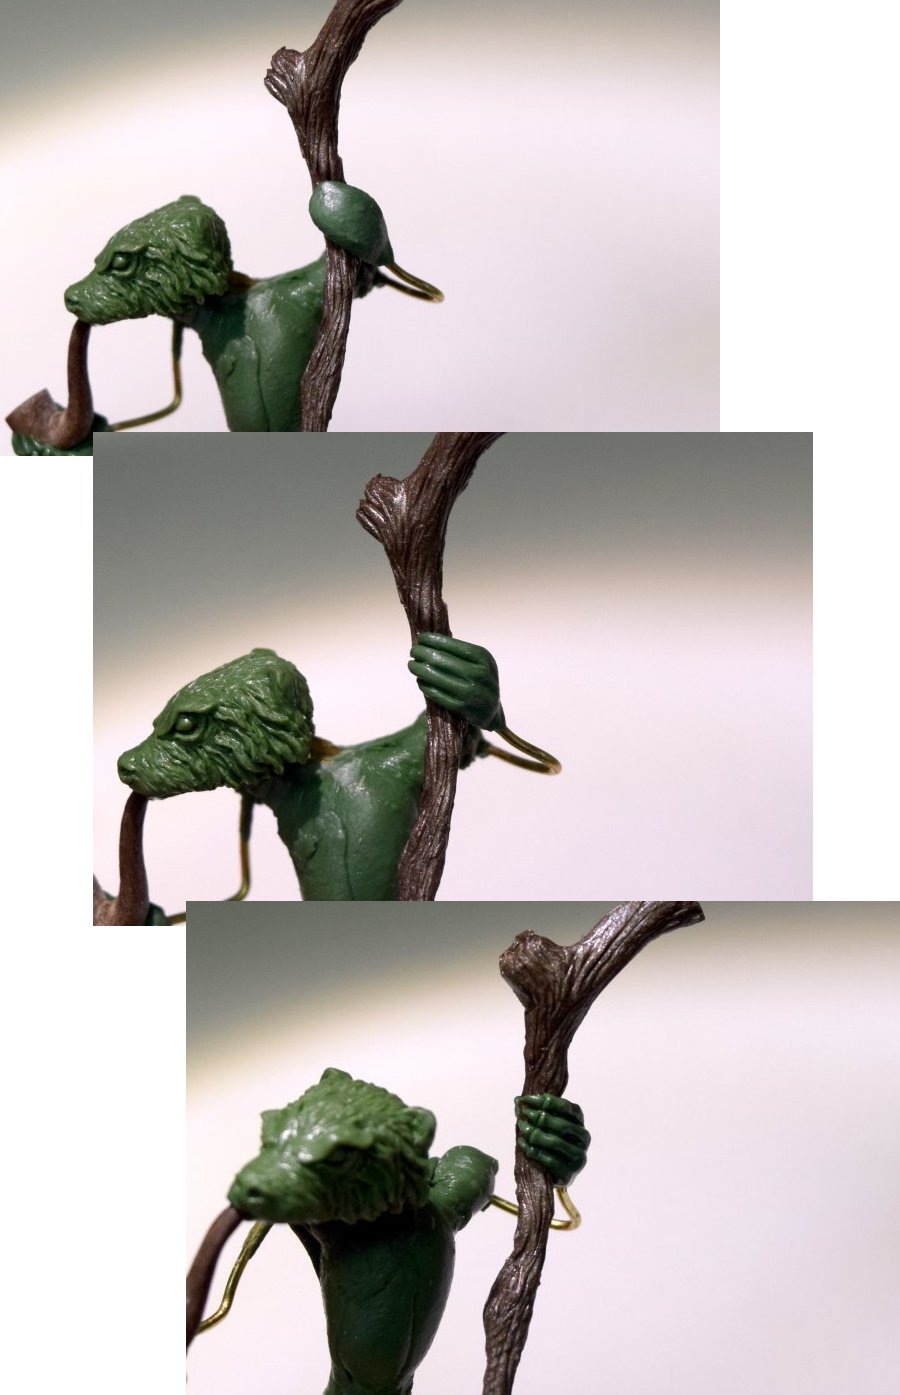
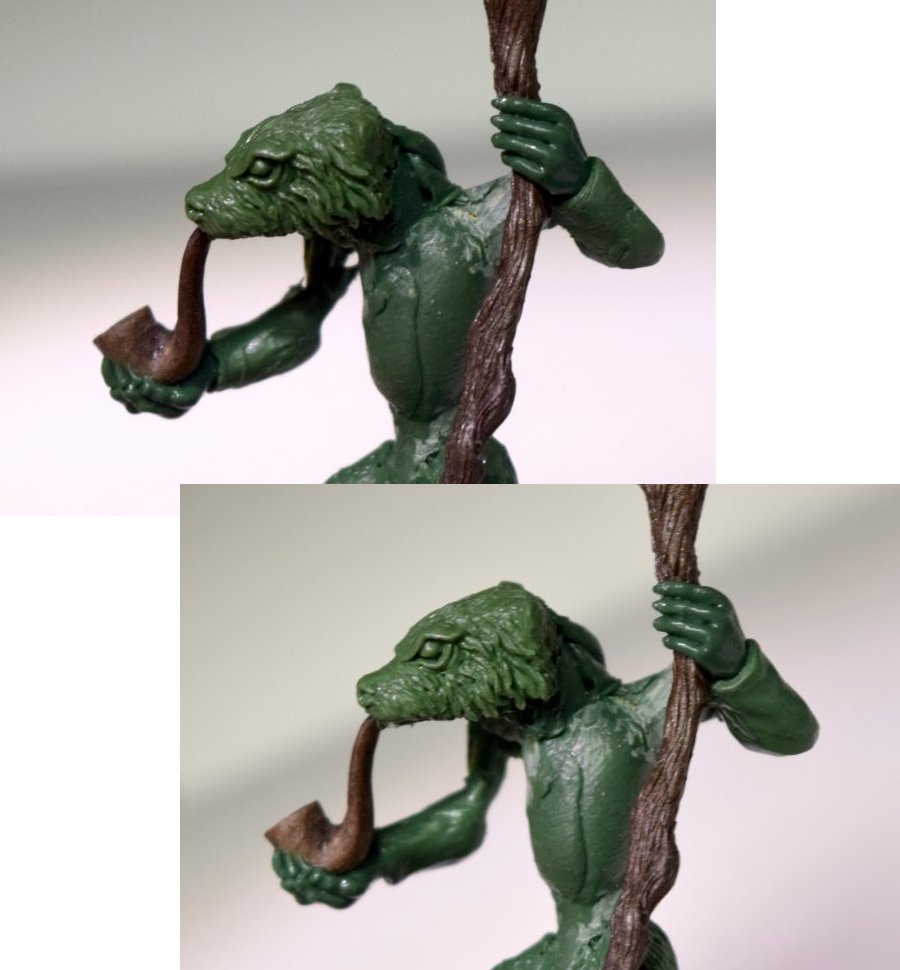
Next, I sculpted the badger's head. I took the cured head armature, and added a couple of blobs of fresh putty for the eyes. Then I added two more blobs to form the cheeks; and a thin layer over the top of the head. Next I added some larger bits of putty to the back lower quarters of the head, to form the bulk of the jaw. I blended this all together using the Clay Shaper.
Then, using the sharp edge of my Wax 5, I cut in a line for his mouth, and marked in the shape of his eyes, pushing the putty up and down to form the eyelids. I used the Clay Shaper to smooth and refine the eye area, then added a couple of lumps of putty for ears, and a little more bulk to the back of the jaw area. I continued to tidy and refine the head, and added a tiny bit of putty for the nose.
Next, I used the blunt end of the Wax 5 to pull the putty downwards to rough in the fur, the used the sharp end to refine each section of fur to add definition.

Once the head was fully cured, I drilled a hole into the badger's body, and fitted the head armature's wire into it, and bent it around until I was happy with the position.
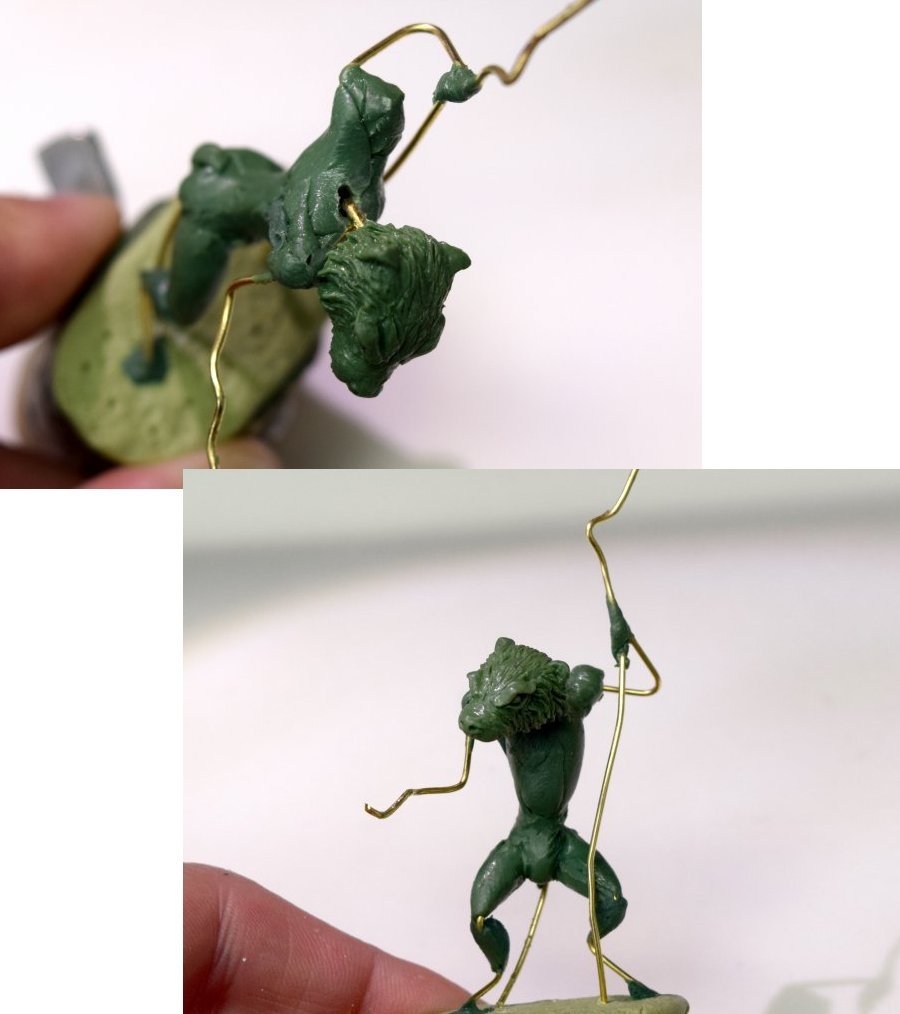
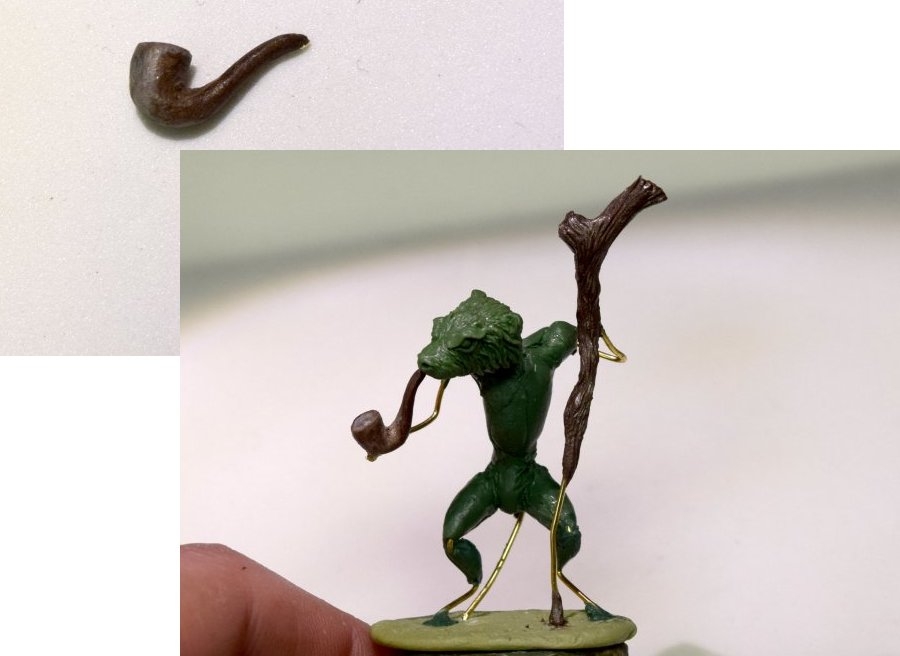
With the head in place, I test-fitted the pipe, which turned out to be way too long to fit between his hand and his mouth… so I made a shorter one.
Of course, a little pipe doesn't take much putty, and I'd mixed up far too much. So rather than let it go to waste, I used it to start on the badger's staff. I rolled the putty into a thin sausage, pressed it onto the staff armature wire with my fingers, smoothed it with he Clay Shaper, then used the Wax 5 to cut in lines for the wood grain. I only had enough putty mixed to get about halfway down, but that was OK – if I'd done the whole thing, it would have made sculpting the feet harder.
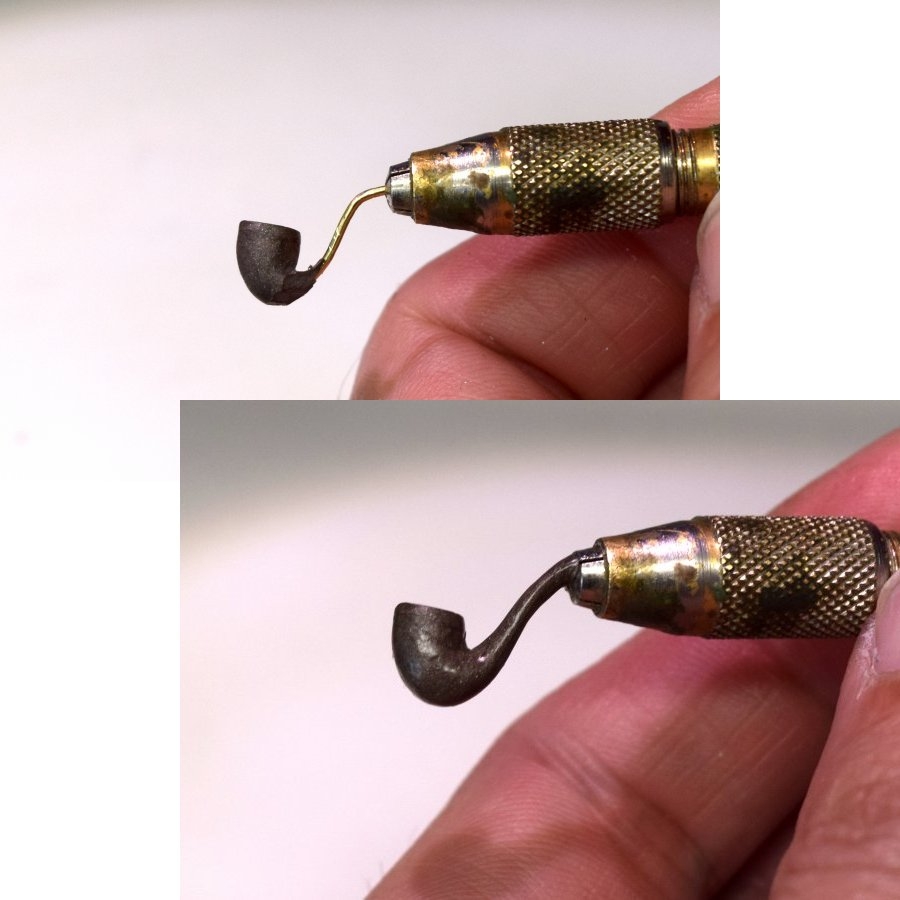
At this point, I got nervous about the pose again. I thought the pipe would be OK, but I thought he looked good with the hand down too. In the end, I decided on the pipe, and started filing it down to reduce the size and get it smooth.
With the pipe filed down, I glued it to his hand with superglue. You have to be careful with superglue; many mould rubbers react badly to it, and it liquifies and foams badly under the heat and pressure of the vulcanising process. In this case though, it would be fine, as the superglue would be entirely encased in putty, so not anywhere near the mould surface.
I moved onto sculpting the hands; I pressed a lump on putty into place, then cut lines in for the fingers, and used the Clay Shaper to gradually refine them. Then I cut a line across for the claws, and continued gently smoothing the fingers, shaping them to show joints and knuckles. Finally I added a thin sausage of putty for a thumb.
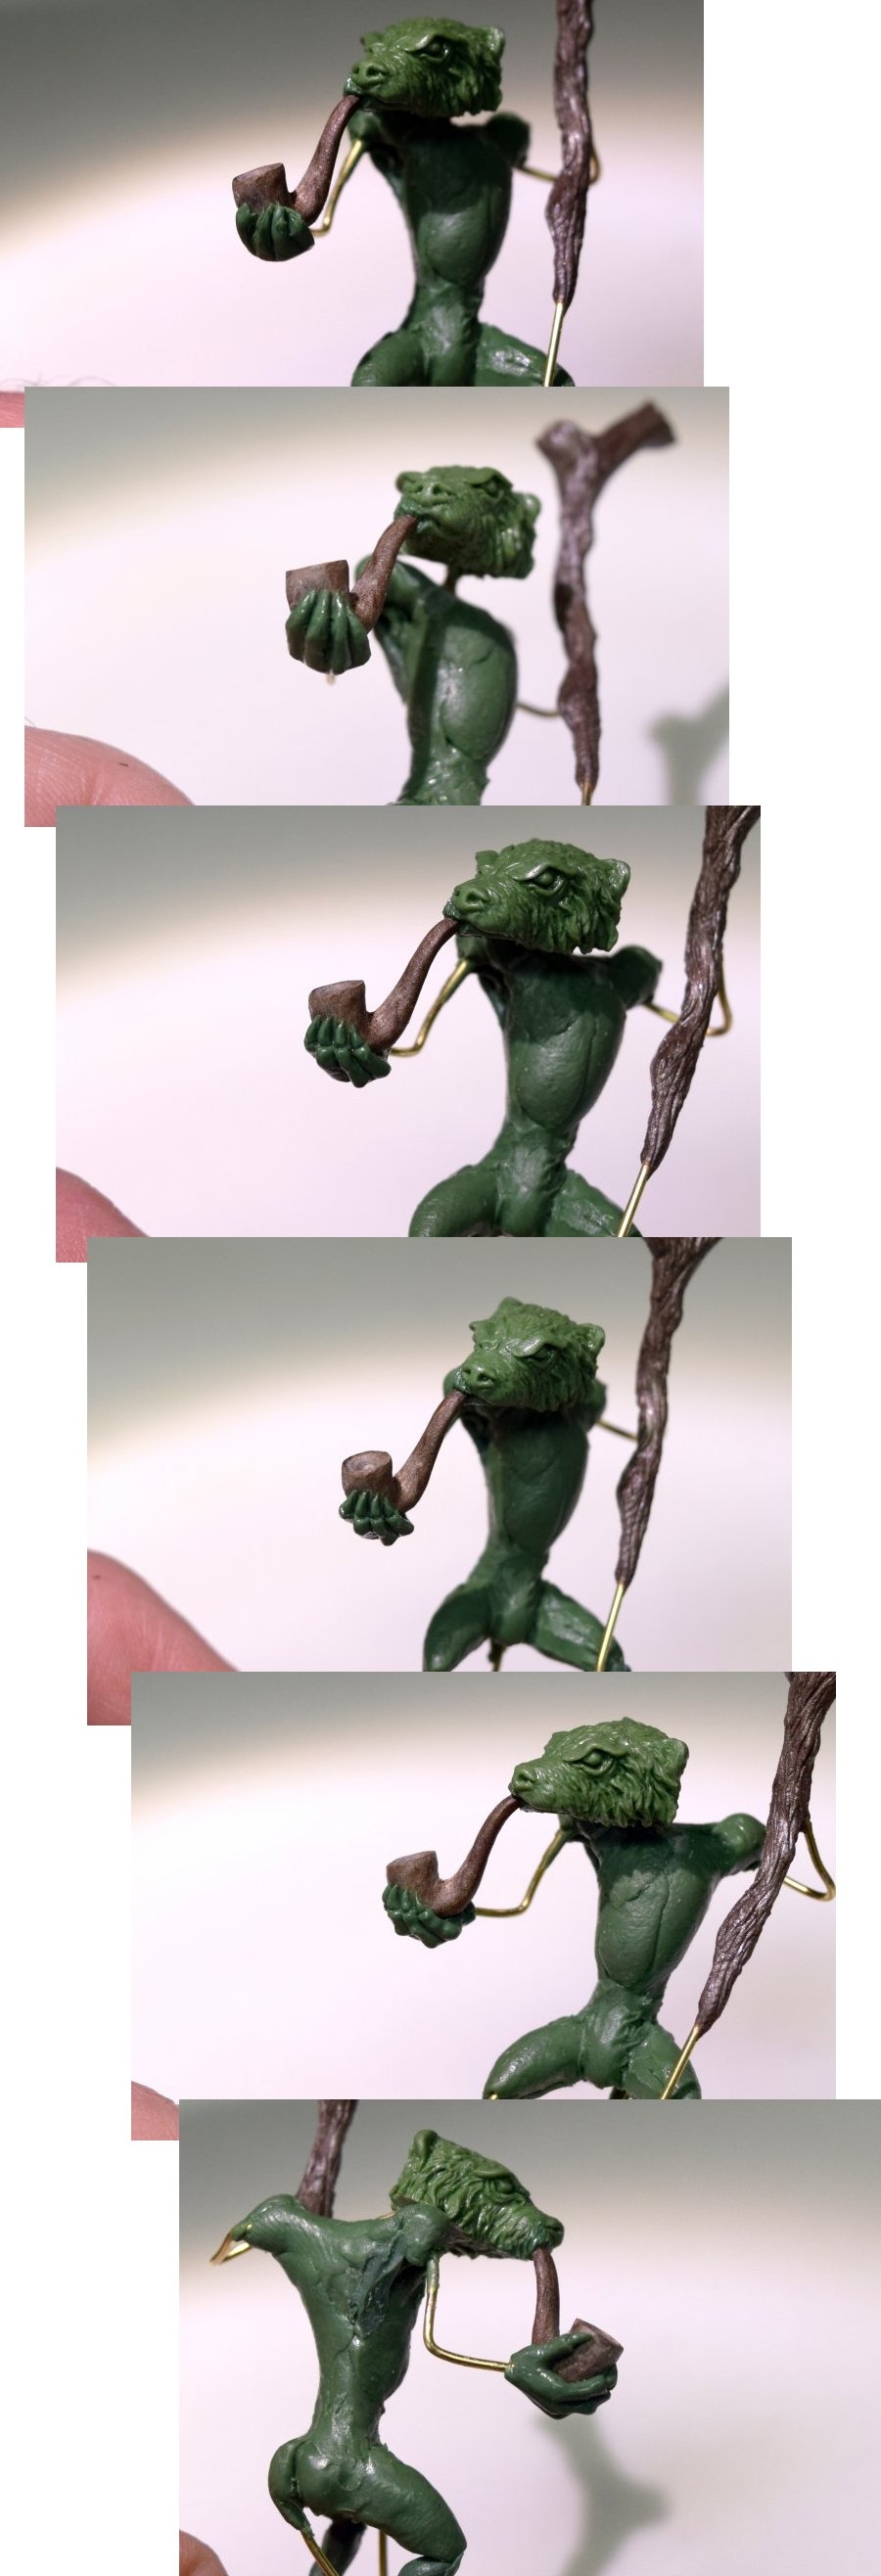
The other hand followed the same process.
Next I started on the lower body, with the feet. Again, a lump of putty was pressed into place on the front of the foot armature, and another added behind to form the heel and ankle joint. Lines were cut in with the Wax 5 for the toes and claws, and the whole thing smoothed and tidied with the Clay Shaper. It's a pretty simple process, but you have to be gentle and take your time.
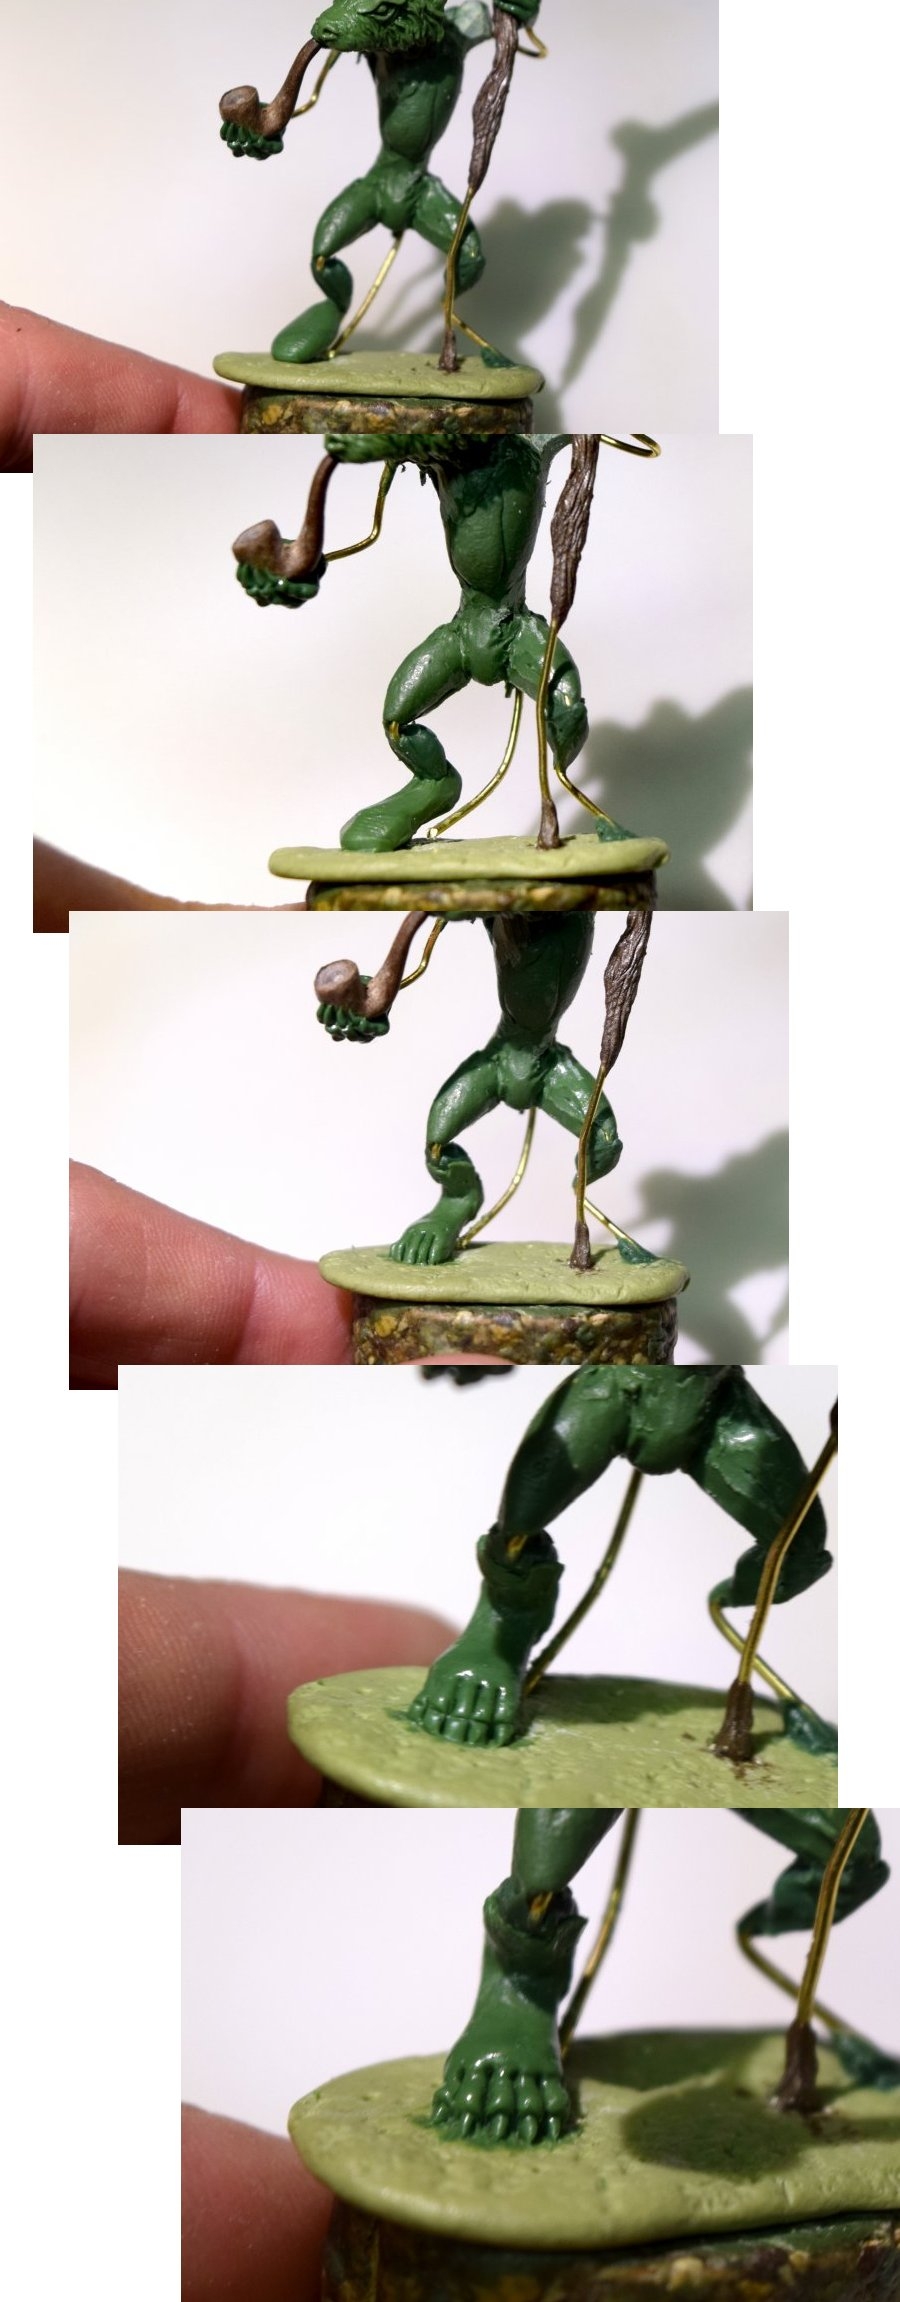
I continued working up the leg; pressing putty onto the armature, then roughing in the fur pattern. I then spent some time gradually refining each separate bit of fur, with the sharp end of the Wax 5.
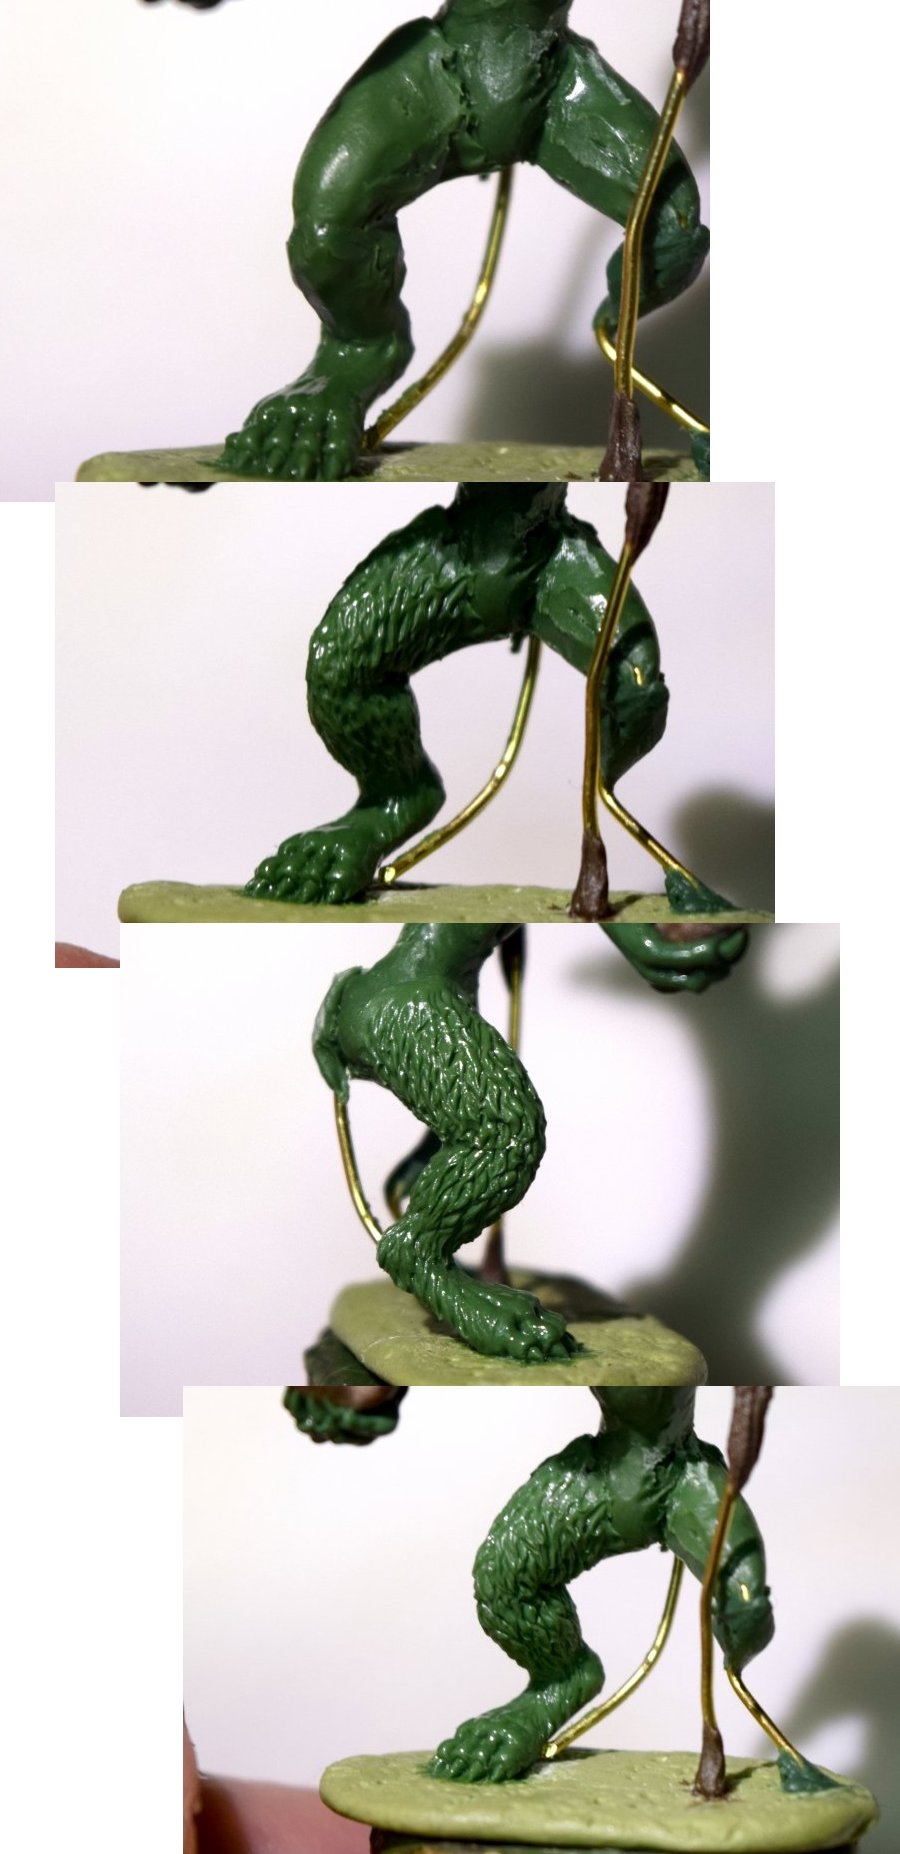
I did the same with the other leg; then used the same process to do the tail.
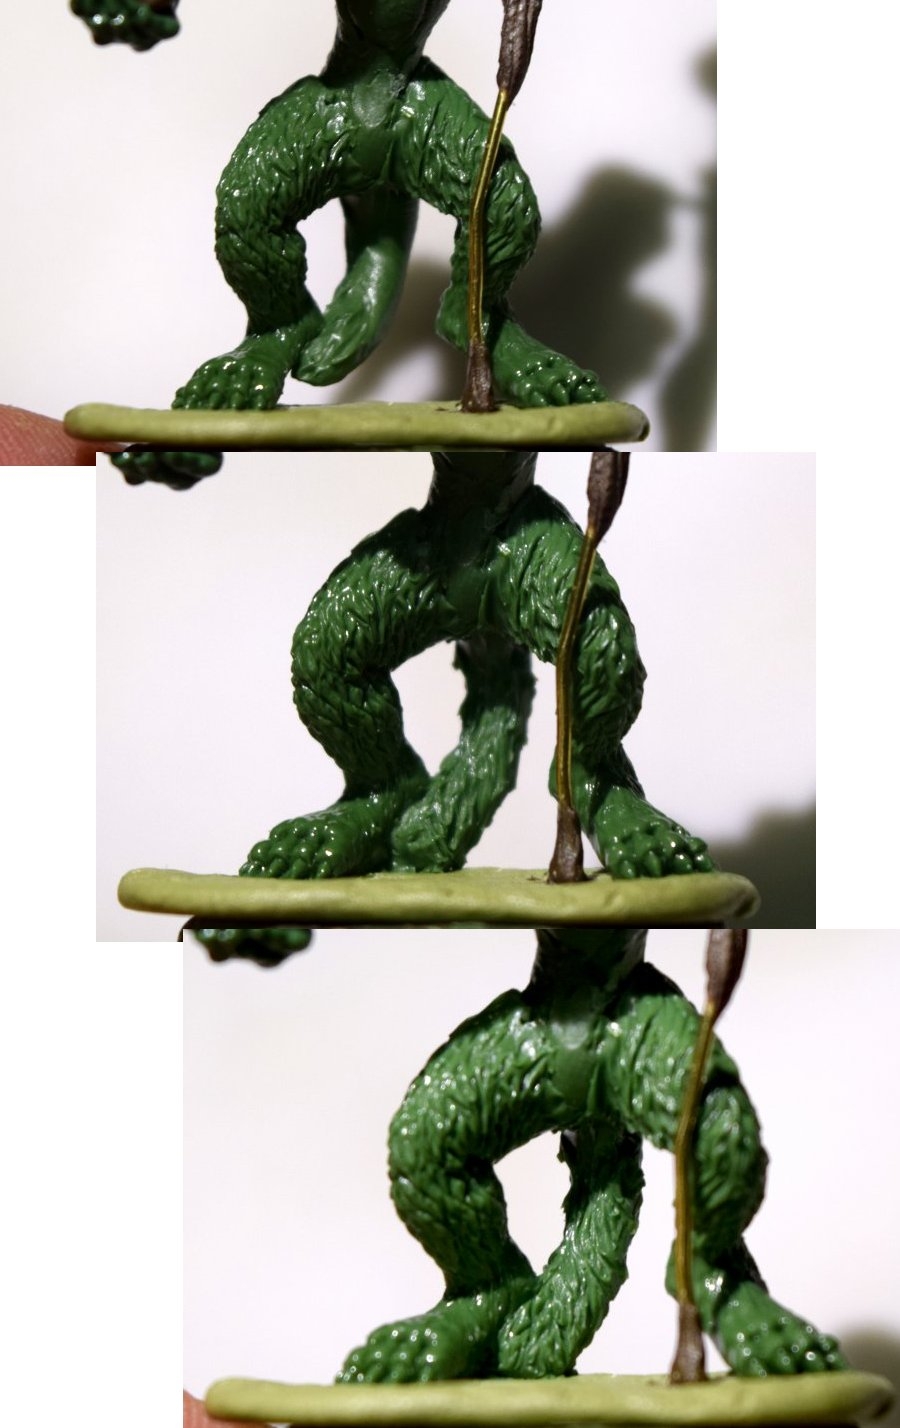
Once the legs were fully cured, I mixed some more Brownstuff and finished the badgers's staff. The sculpt looks a bit odd at this stage, but from here on will start to take shape fairly quickly, as large areas of clothing get added.
I started adding sleeves; they were very simply pressed into place, smoothed, and then some light creases and folds were marked in.
One important factor when sculpting a miniature for production is making it castable; and that means voids and undercuts should be avoided. There was a void between the lower part of the staff and the foot, so I decided to add a section of loincloth to fill it. I added some lumps of putty, blended them together with the Wax 5, then smoothed them with the Clay Shaper, and finally marked in some folds.
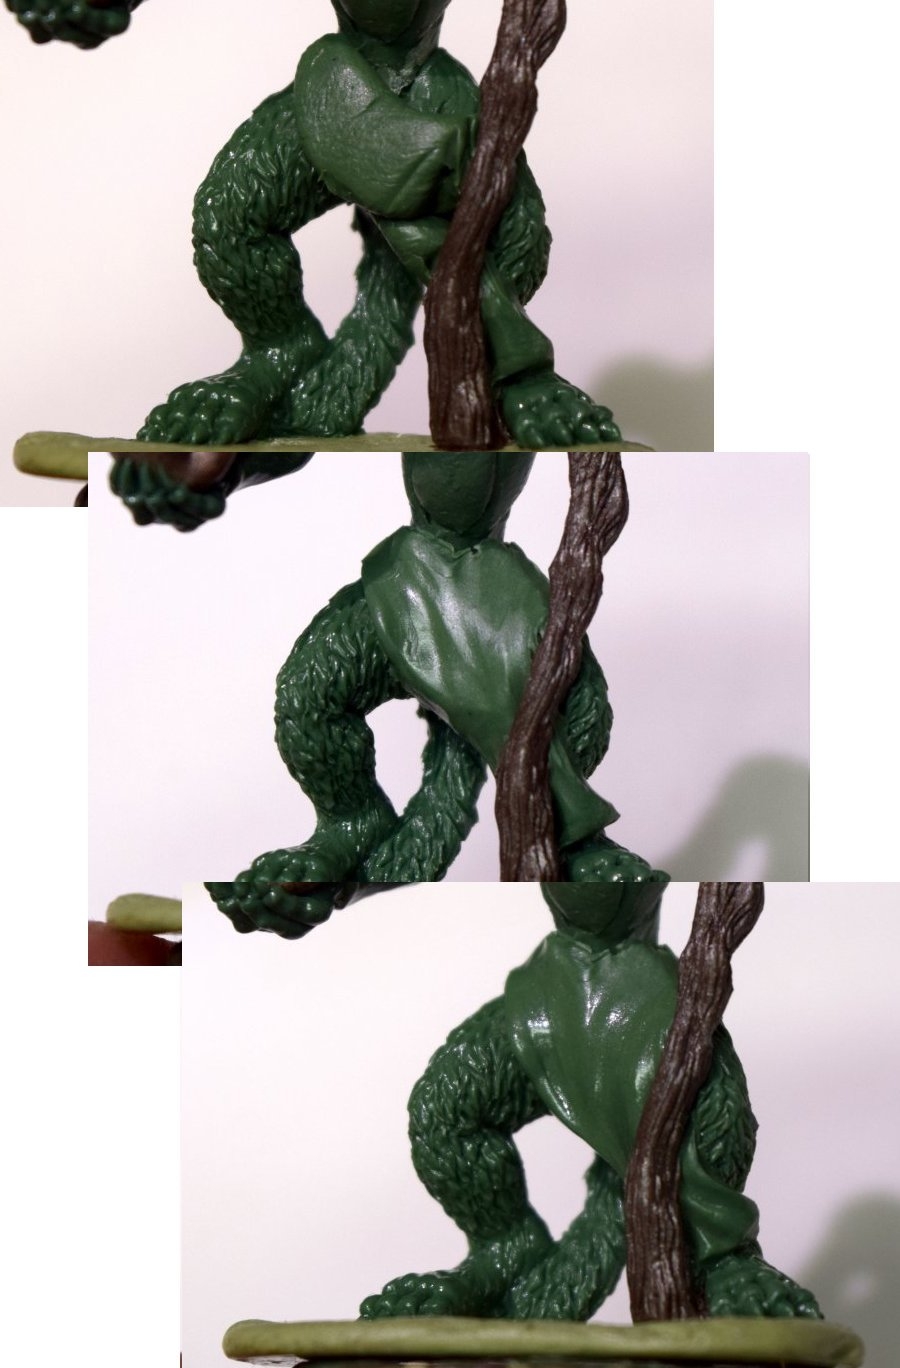
Next I added the lower sections of his robe; again, I added some lumps of putty, blended them together with the Wax 5, then smoothed them with the Clay Shaper, and finally marked in some folds, and marked in a few cuts and holes to make the robe look old and worn.
Often I'd add a belt at this point, but I didn't want one here, as I felt it would just detract from the folds in the robe. So I assumed the robe had a thin belt or cord tying it, which would be hidden by the folds of the upper part of the robe.
I added more putty for the upper portion, and gradually pulled it downwards until I was happy with the look, then smoothed and tidied it.
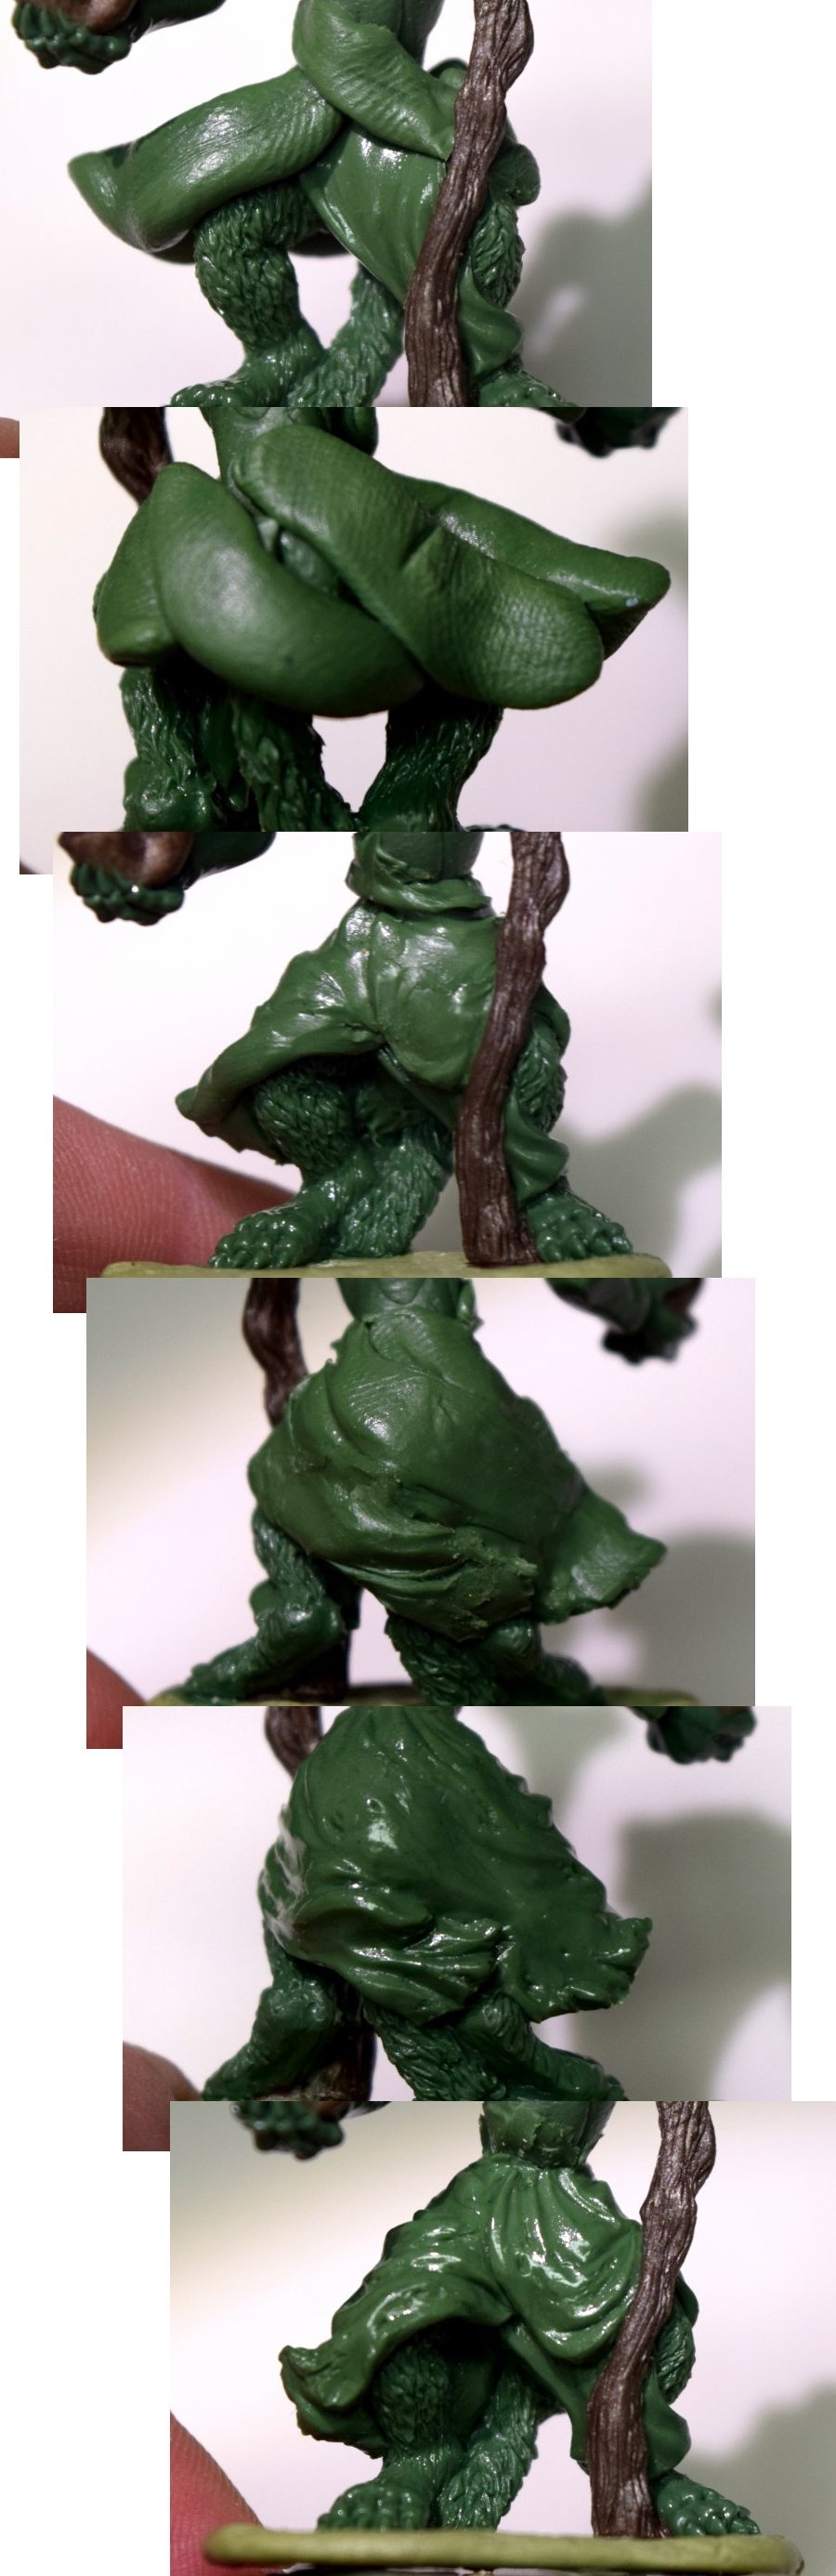
Then I added the robe's sleeves; the process was the same, putty pressed into place, blended together, smoothed, then folds were added.
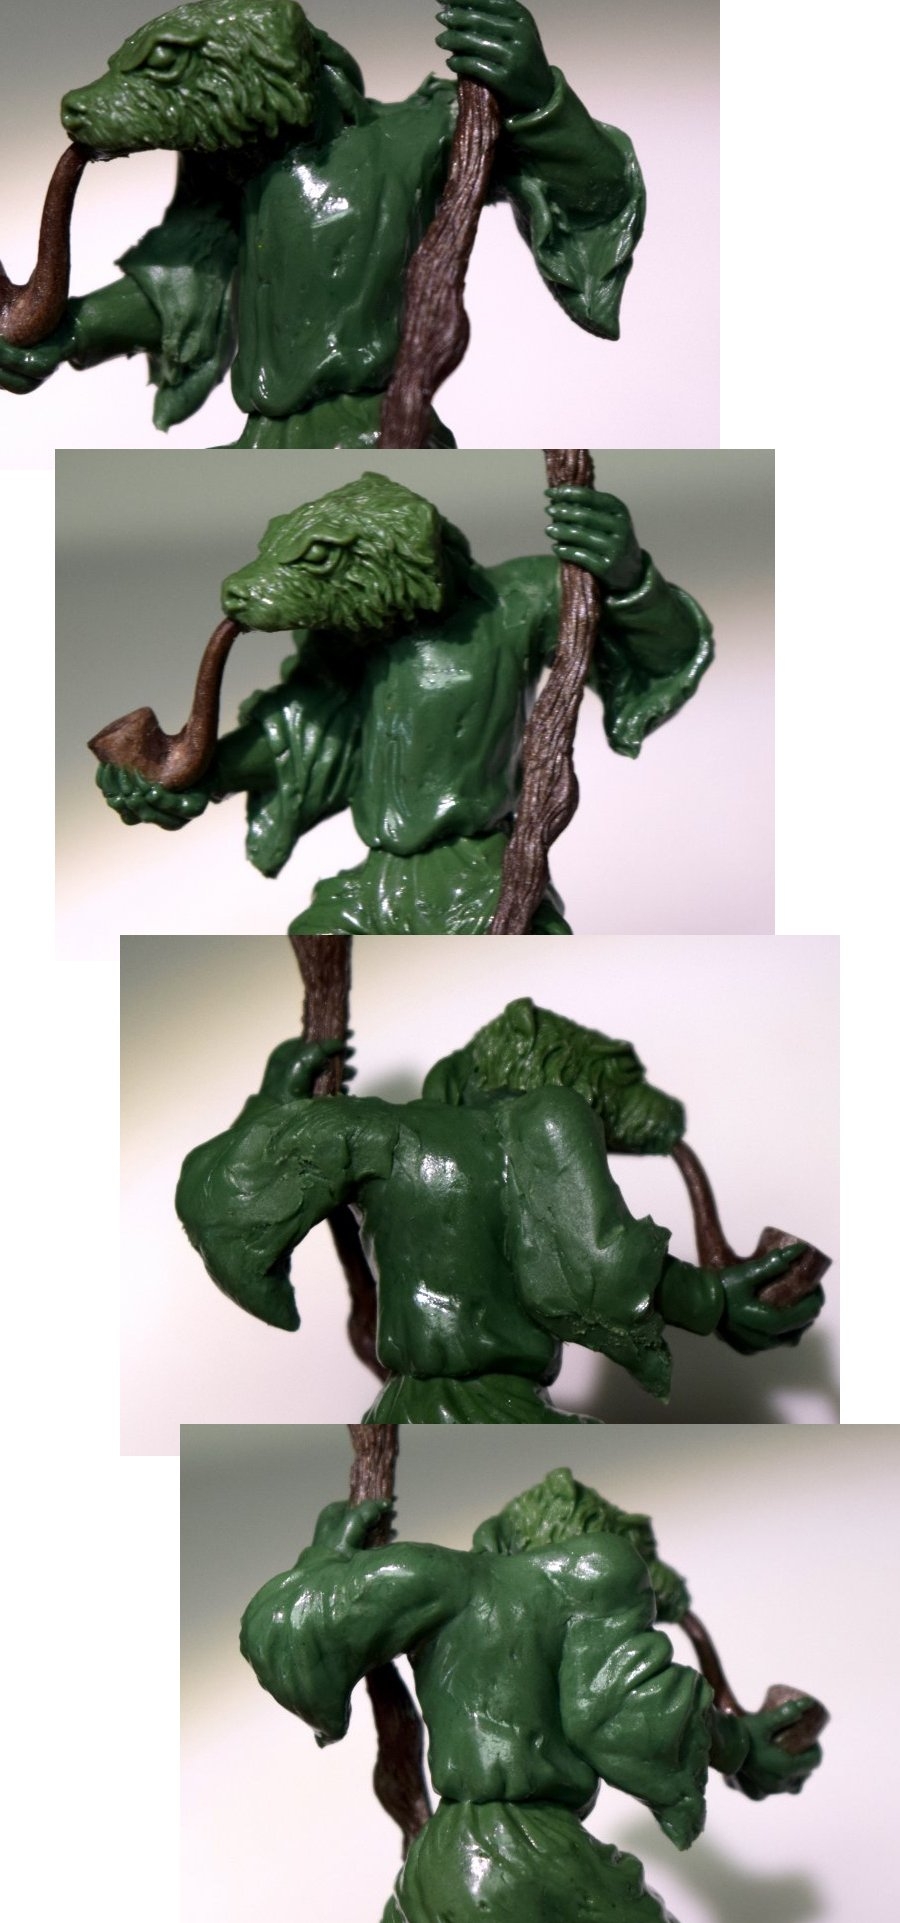
Next, I gave him a scarf. I rolled out some sausages of putty, and wrapped three of hem around his neck. I added a lump of putty for the scarf's knot, then a couple of strips for ends of the scarf. I then did a bit of careful blending and smoothing on it, and cut in lines for the tassled ends.
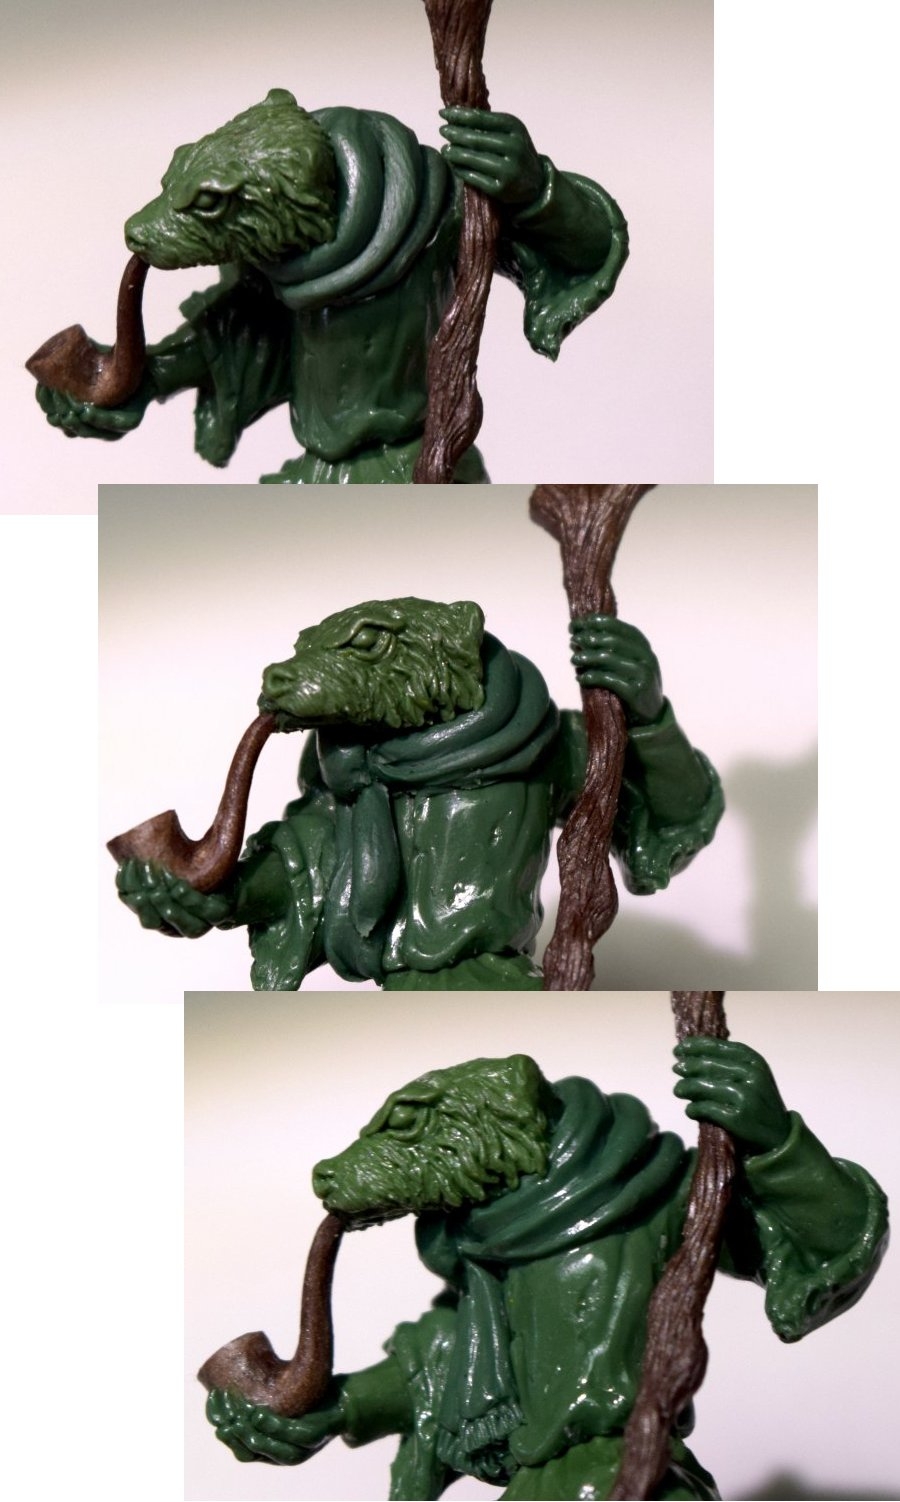
At this point, the miniature still had a large void between his arm and his staff. Thankfully he also needed a bit of equipment adding anyway, so I used that to fill the gap. A shoulder bag and a scroll filled the gap pretty well.
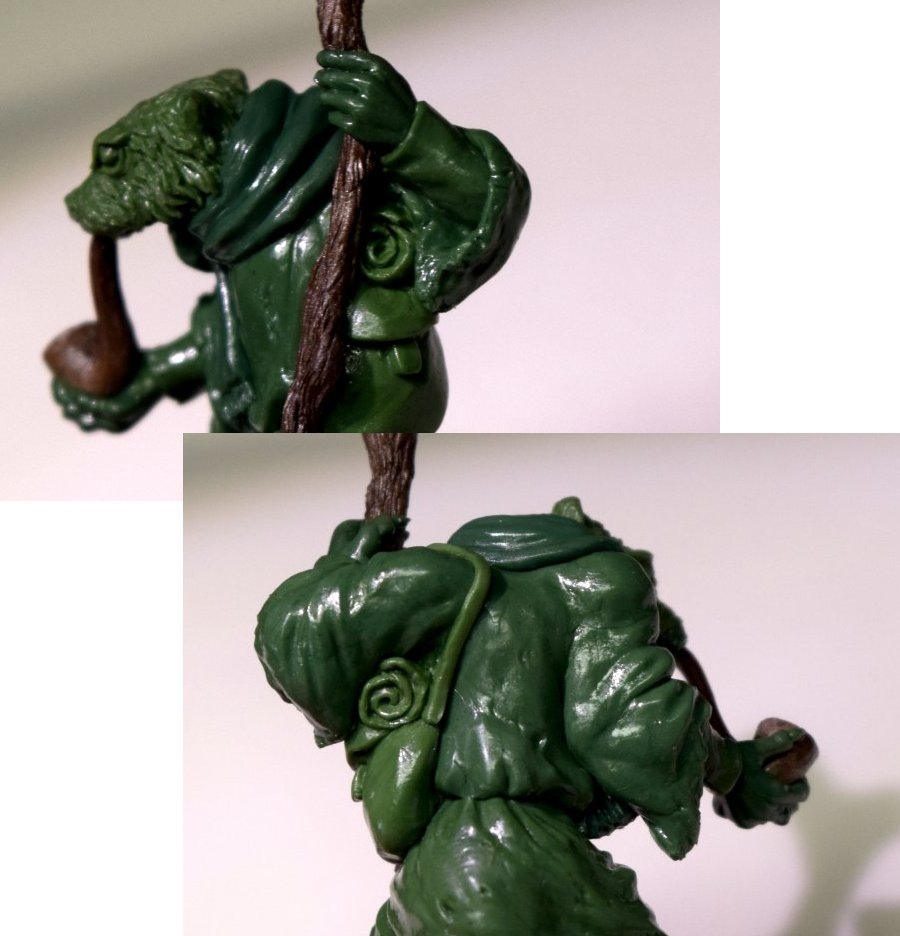
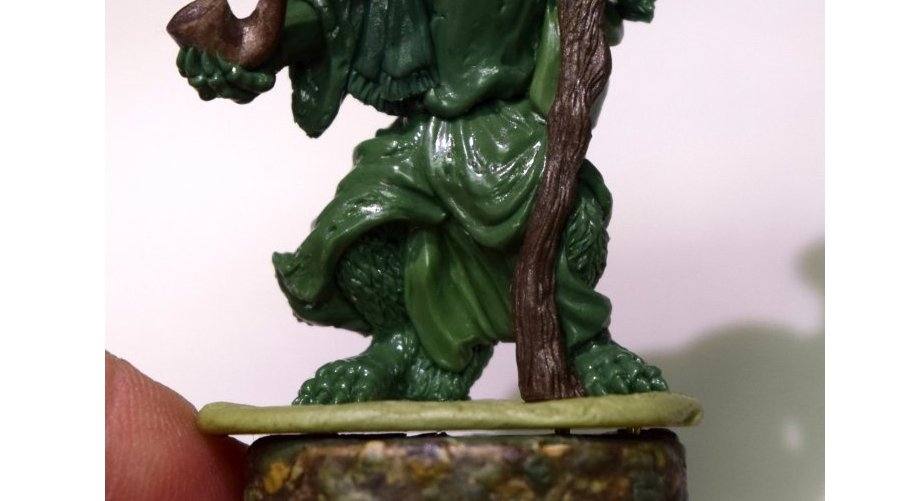
I also went back to the loincloth area; it had served the purpose of making the miniature easier to mould and cast, but I wasn't happy with the way it looked. So I extended it across the miniature further, which helped to improve the balance a lot.
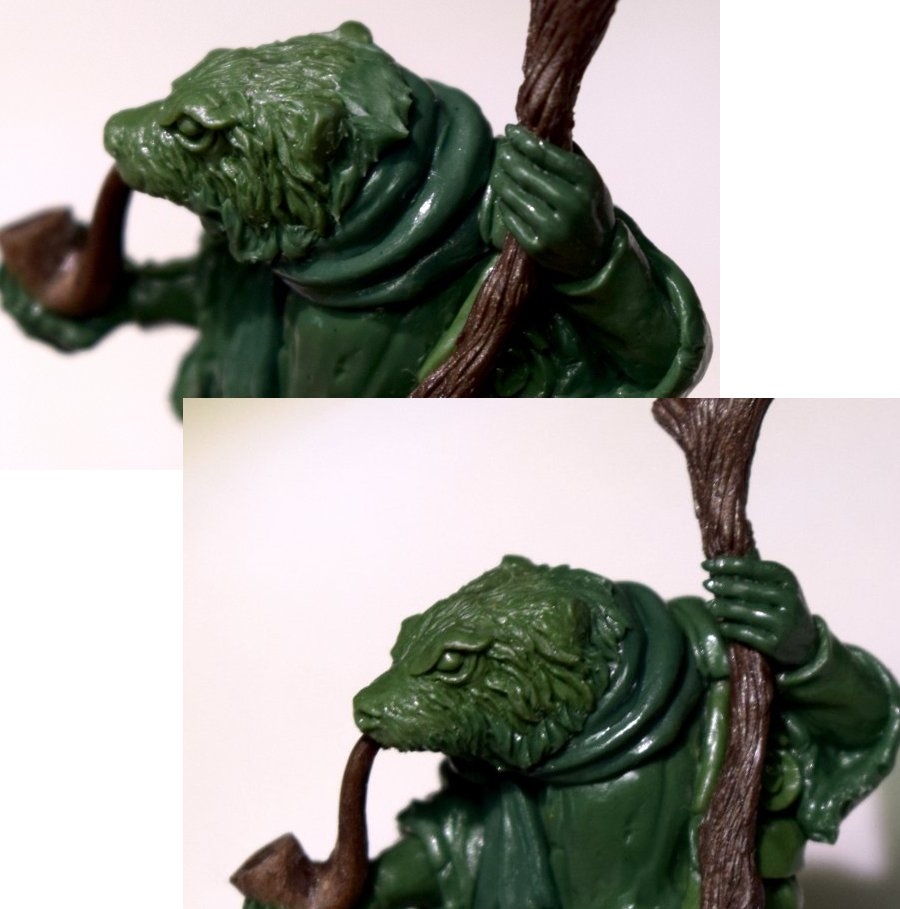
Finally, I wanted this badger to be an old, wise brock; so I thought a bit of extra hair might help give that impression. I added small amounts of putty to the back of his head and lower jaw, then worked them into shape.
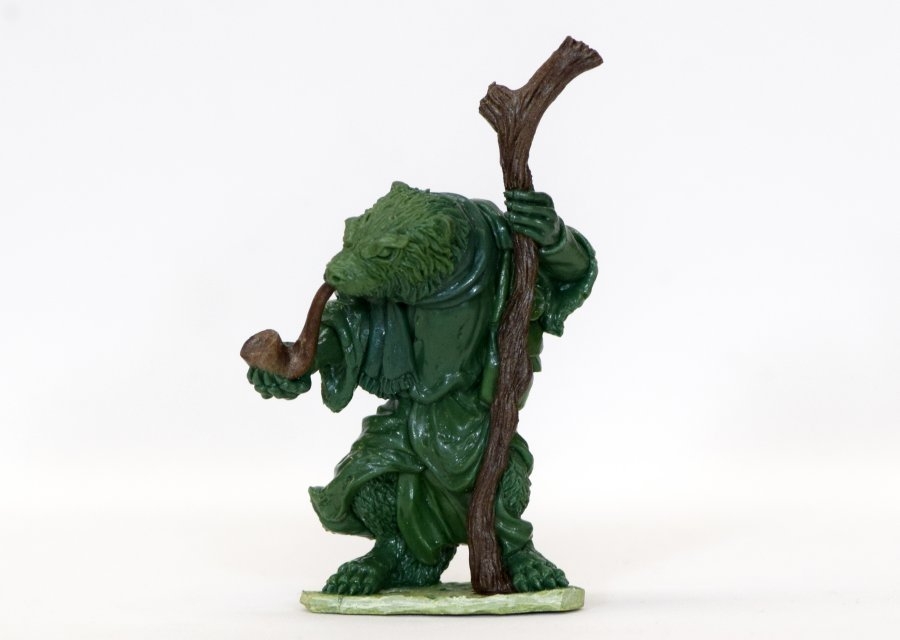
And that was the job finished; after a six month hiatus, I've finally sculpted a new miniature!
Want to take to the battlefields of Northymbra? Order your copy of Burrows & Badgers today, and pick up some great miniatures from Oathsworn Miniatures!

Comments
You must be logged in to comment on this post. Click here to log in.
Submit your comment