
Today marks the 600th anniversary of the Battle of Agincourt. To commemorate this famous battle we have organized a day heaped with history for you. Here is the final instalment, a stunning illustration of Henry V diving into the fray.
Extract from Command 8: Henry V by Marcus Cowper.
Artwork by Graham Turner
The Battle of Agincourt
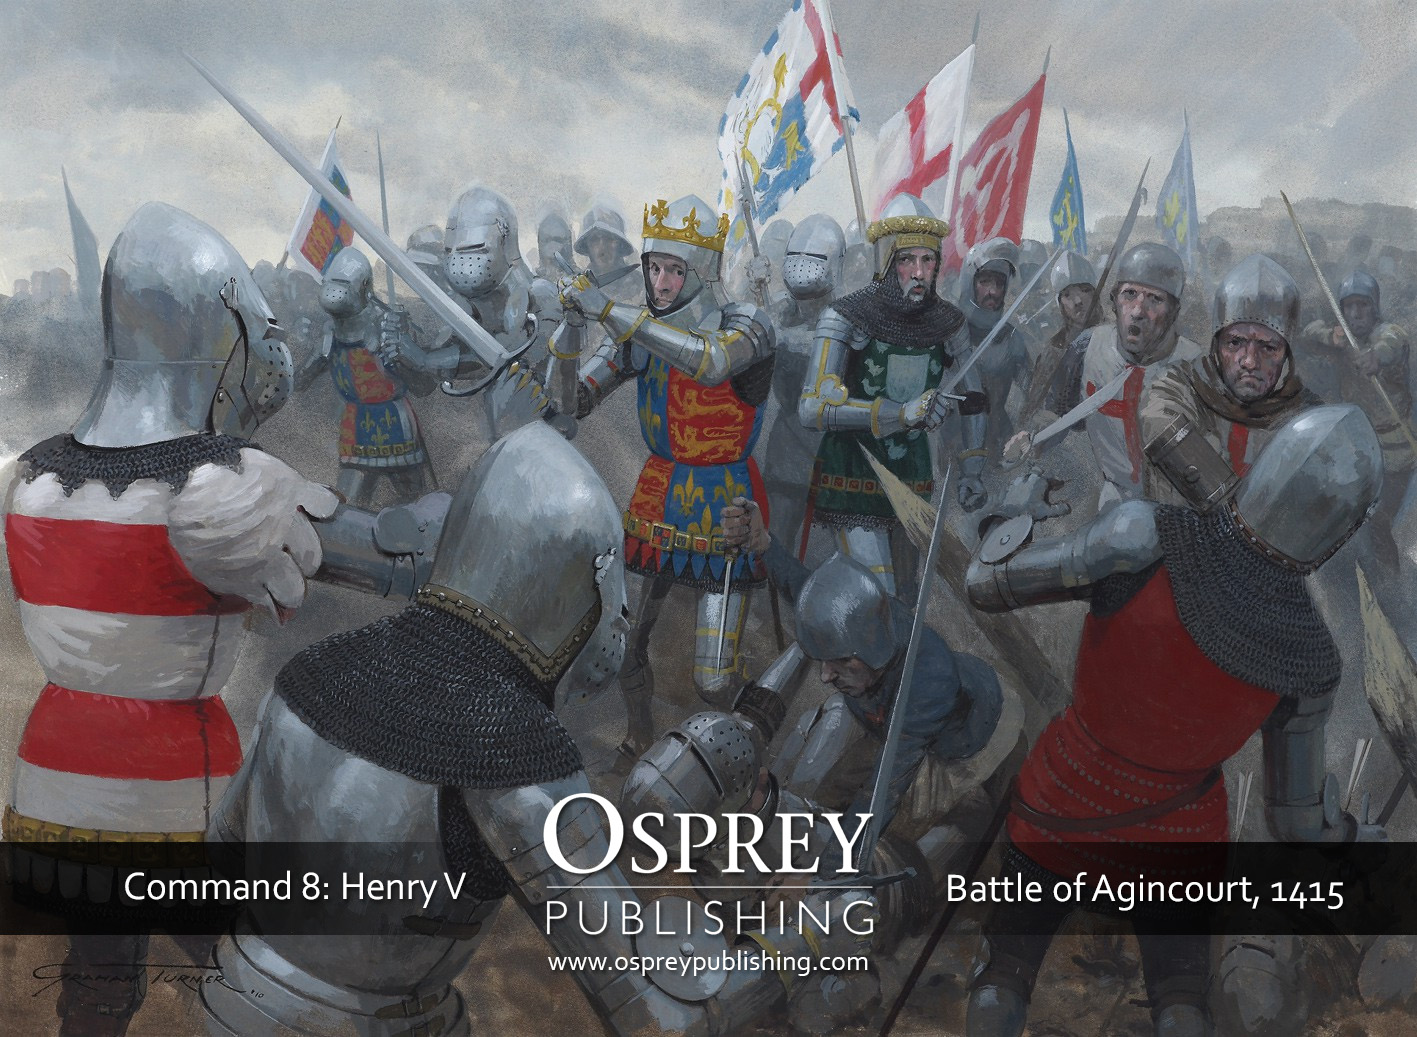
This scene depicts the critical point of the battle. The French men-at-arms have crossed the field and are embroiled with the English line, while the English archers are beginning to engage from the flank in an assault that contributed a great deal to the eventual English victory. In the centre is Henry himself, with his crown on top of his unvisored great basinet. To his left is Sir Thomas Erpingham, who gave the order for the archers to fire their first volley, and some way to his right is Humphrey, Duke of Gloucester. Behind Henry fly the banners associated with Agincourt (from left to right): Henry’s personal standard, the cross of St George, the Holy Trinity, and the standards of Edward the Confessor and St Edmund. Advancing towards Henry is Jean, Sire de Croy, who, along with his retinue, made a pact to kill Henry and supposedly hacked off part of his crown. On the ground in the centre is a French knight struggling with an English archer, who is trying to stab him through his open visor, while to the right another French knight has felt the full force of one of the heavy mallets wielded by the lightly armoured archers.
For further reading on the battle of Agincourt take a look at Campaign 9: Agincourt 1415, Men-at-Arms 85: Armies of Agincourt, Command 8: Henry V and Weapon 30: The Longbow.
| Part Three: The Killing of the Prisoners |

Comments
You must be logged in to comment on this post. Click here to log in.
Submit your comment